
Adding a chatbot to your WordPress site empowers visitors with instant answers to their questions. Your bot generates leads around the clock and significantly reduces your support burden.
This comprehensive guide walks you through the entire process step by step. You'll learn how to install the Typebot plugin and configure its core features. You'll also discover how to strategically position your bot and resolve common issues.
What a WordPress chatbot is and why to add one
A WordPress chatbot is a small conversational layer added to your site, usually as an embedded widget or chat bubble. It transforms visitors’ experience from “scrolling and guessing” to “asking and getting an answer.”
Instead of making visitors hunt through menus, the chatbot offers a direct path. They type a question, tap a button, or choose an option, and the site responds immediately.
Most WordPress chatbots perform three main jobs, sometimes in the same conversation:
- Support without ticket back-and-forth. Visitors often arrive with specific questions like do you ship to my country or where’s the invoice? A chatbot provides fast answers without pushing visitors into contact forms.
- Guidance as a self-serve concierge. A good chatbot does more than answer, it directs. It guides visitors through products or services, points to the right page, or helps choose the best option based on input.
- Natural lead capture. When visitors engage, the chatbot can ask for a next step, like an email or phone number. Instead of a cold form, it flows naturally as part of the conversation: question, answer, next question. This subtle change improves visitor behavior on the page.
Key benefits of adding a chatbot in WordPress
A chatbot works like an “always-on” interface by reducing friction exactly when visitors decide whether to stay, leave, or buy. Here’s what it offers and why it matters on real WordPress sites:
- 24/7 availability: chatbots handle inquiries outside business hours, keeping visitors engaged. Many website interactions are time-sensitive, without quick responses, visitors leave and often don’t return.
- Instant answers: visitors expect fast replies. Chatbots provide immediate responses to common questions and guide users through your site. This means fewer “I couldn’t find it” drop-offs and more “got it—next step” moments.
- Lead generation built into the conversation: a lead generation chatbot engages visitors, collects information, and qualifies leads. By the time a human agent steps in, the basics are gathered. This simplifies the sales team's work since the chatbot sorts visitors who are just browsing from those with concrete needs.
- Cost-effective support coverage: hiring staff to cover many hours is costly. Chatbots manage repetitive interactions efficiently without high overhead.
The best chatbot for WordPress removes friction with the fewest steps. Like a good navigation menu, it stays quiet, helpful, and always points somewhere useful.
What you need before you start
If you're new to building bots, check out our guide on how to create chatbot for beginners. Otherwise, prepare these two items before embedding a chatbot in WordPress to avoid troubleshooting incomplete setups:
- A Typebot that’s created and published
- WordPress admin access
With these ready, simply install the plugin. Then, generate the snippet from Typebot’s Share options, paste it into WordPress, and test the full experience.
Next, we explore different chatbot types you can add in WordPress, because “a chatbot” can take many forms. Choosing the wrong type is the quickest way to build something unused.
How to add chatbot in WordPress using the Typebot WordPress plugin
If your Typebot is created and published, adding it to WordPress involves just three steps. Install the plugin, paste the snippet, and test. Follow these steps:
- In your WordPress admin, navigate to Plugins → Add New
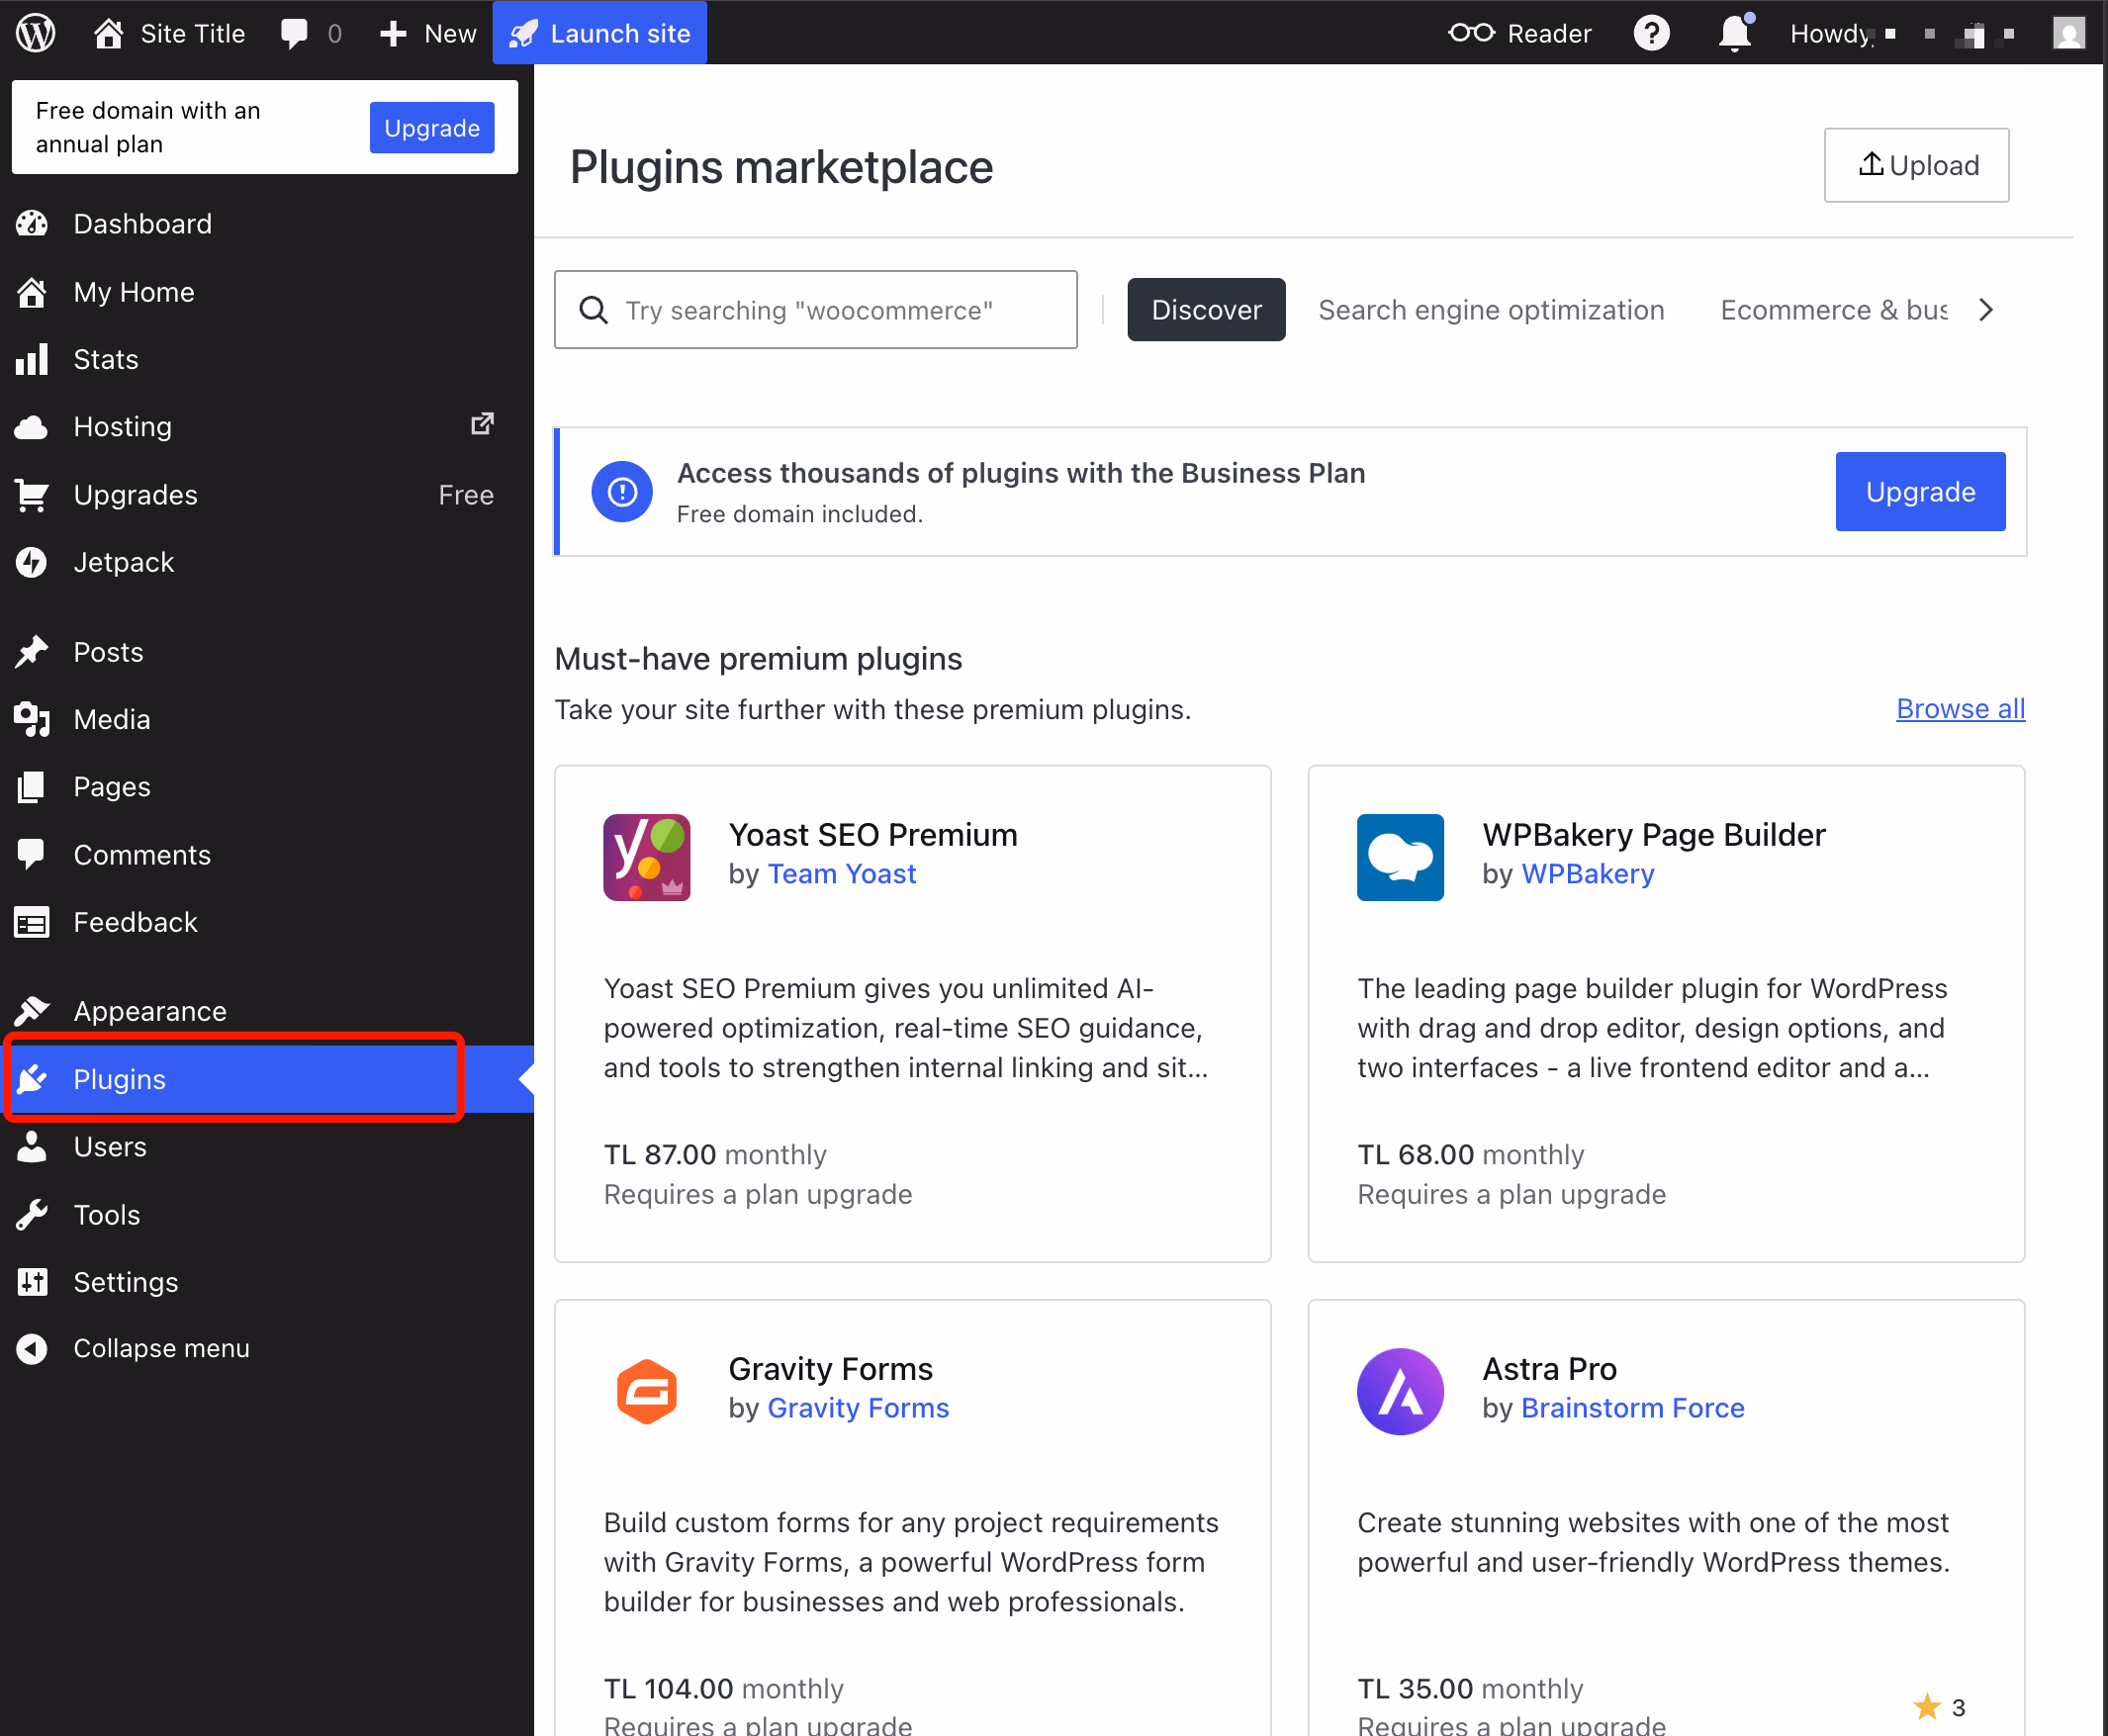
- Search for “Typebot”
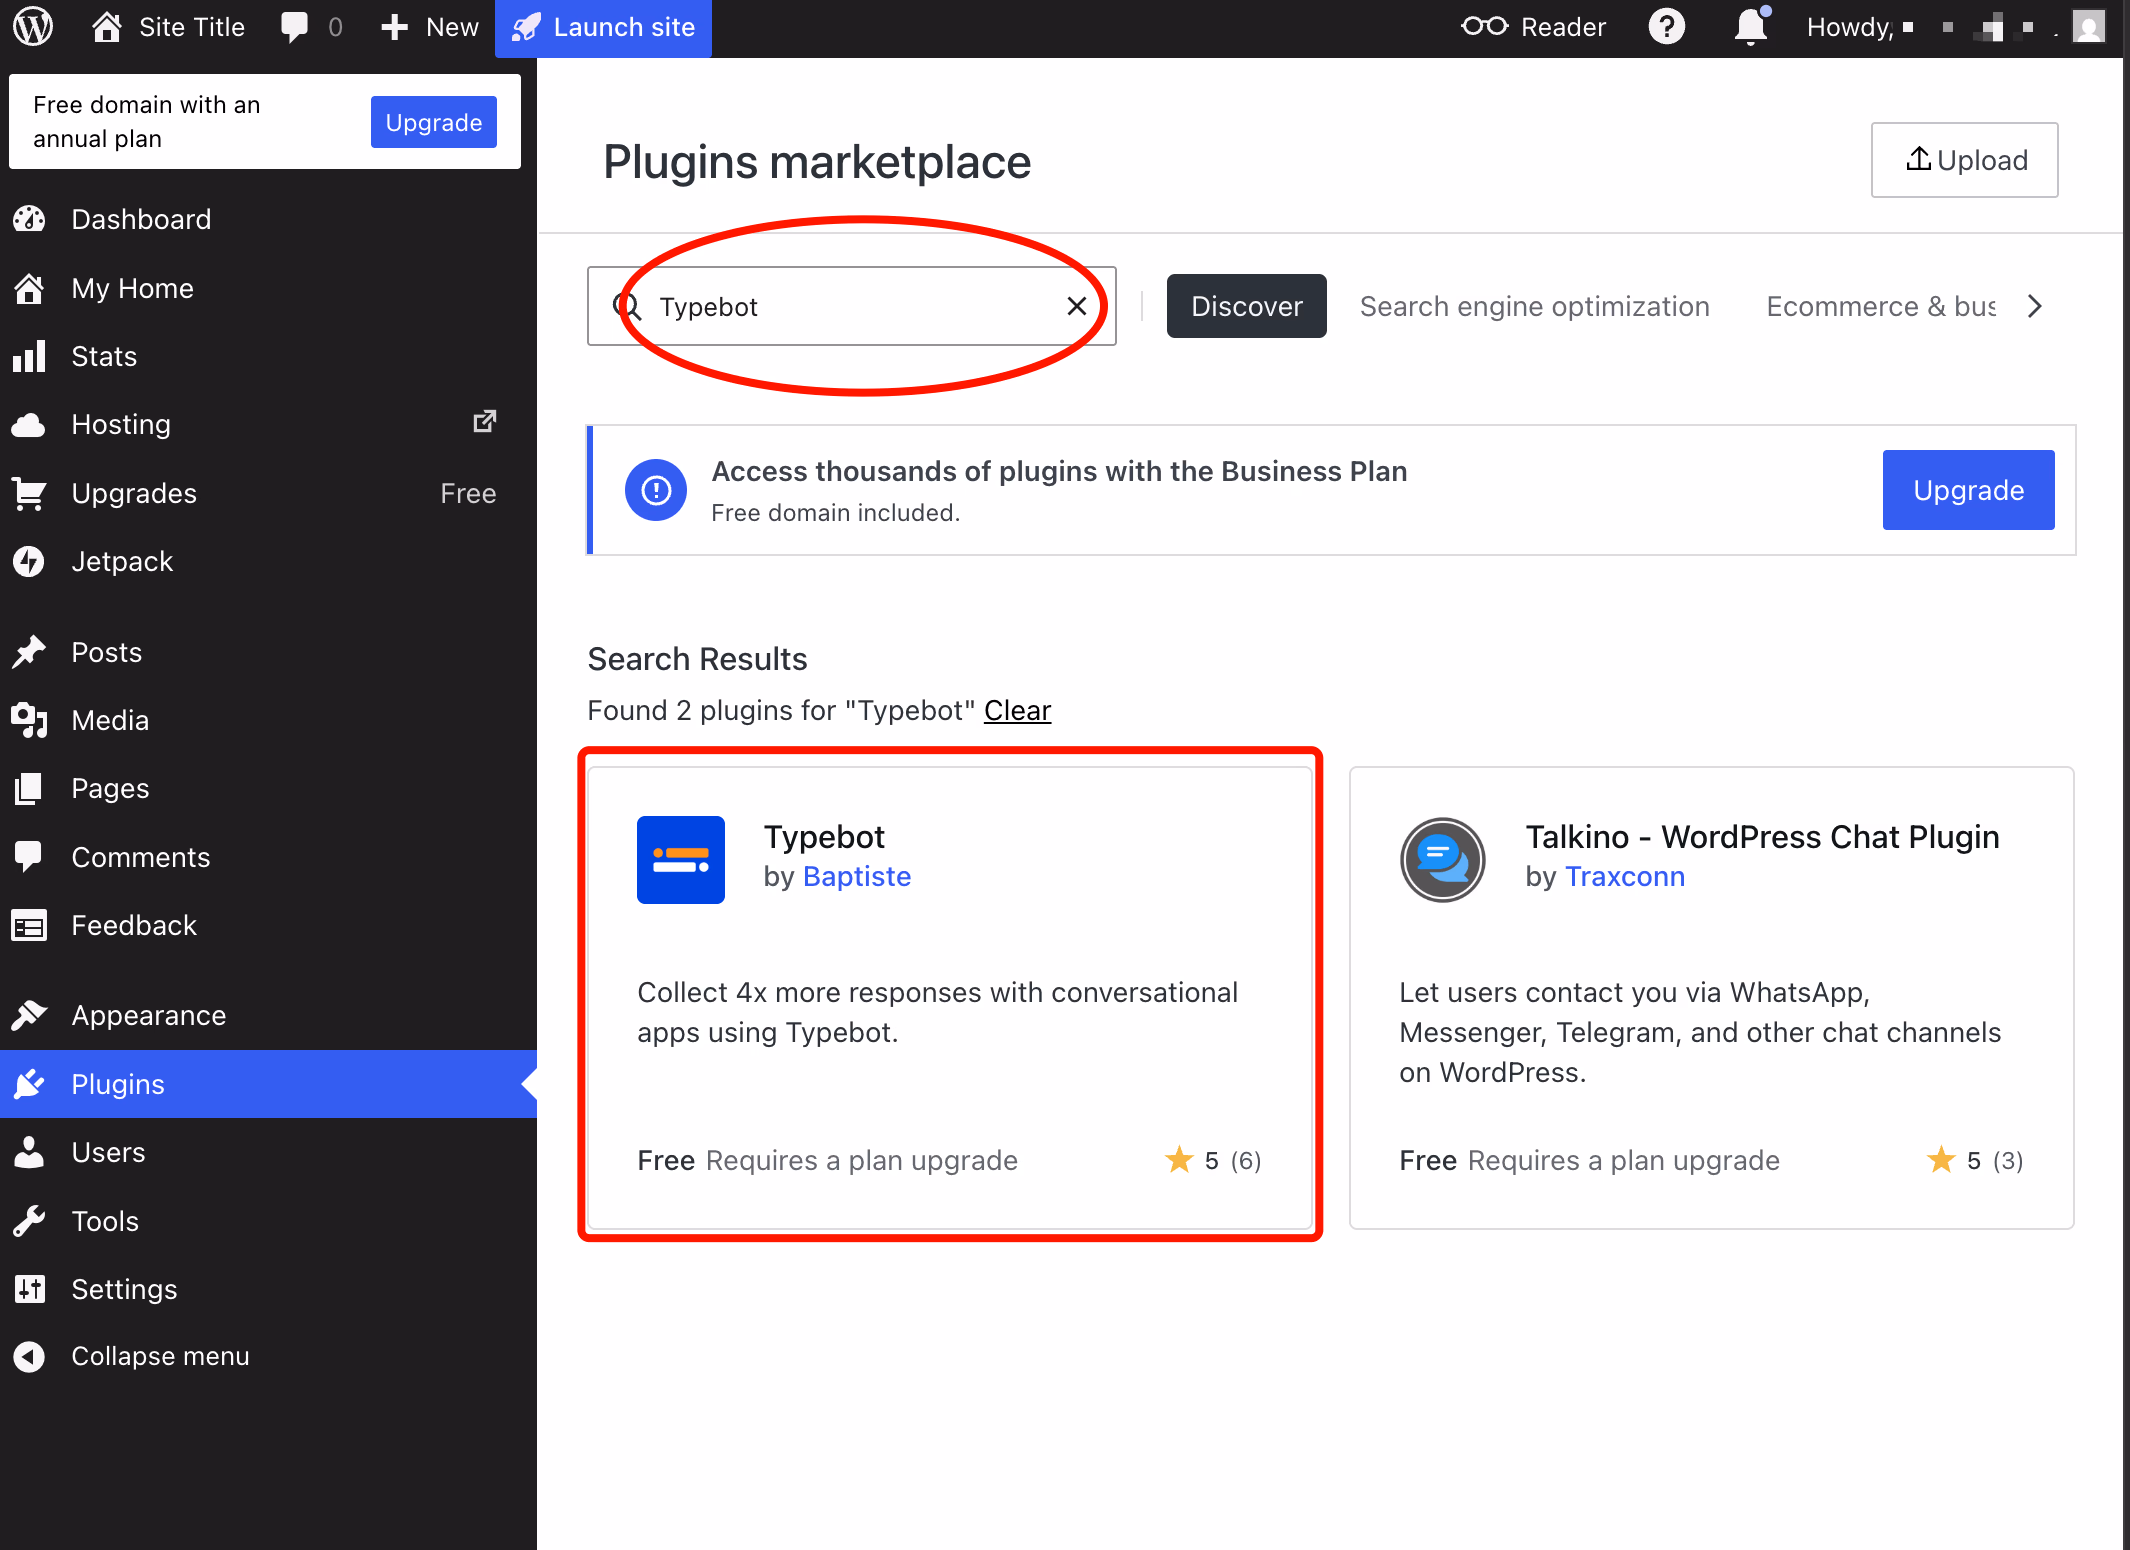
- Click Install Now on the official Typebot plugin, then click Activate
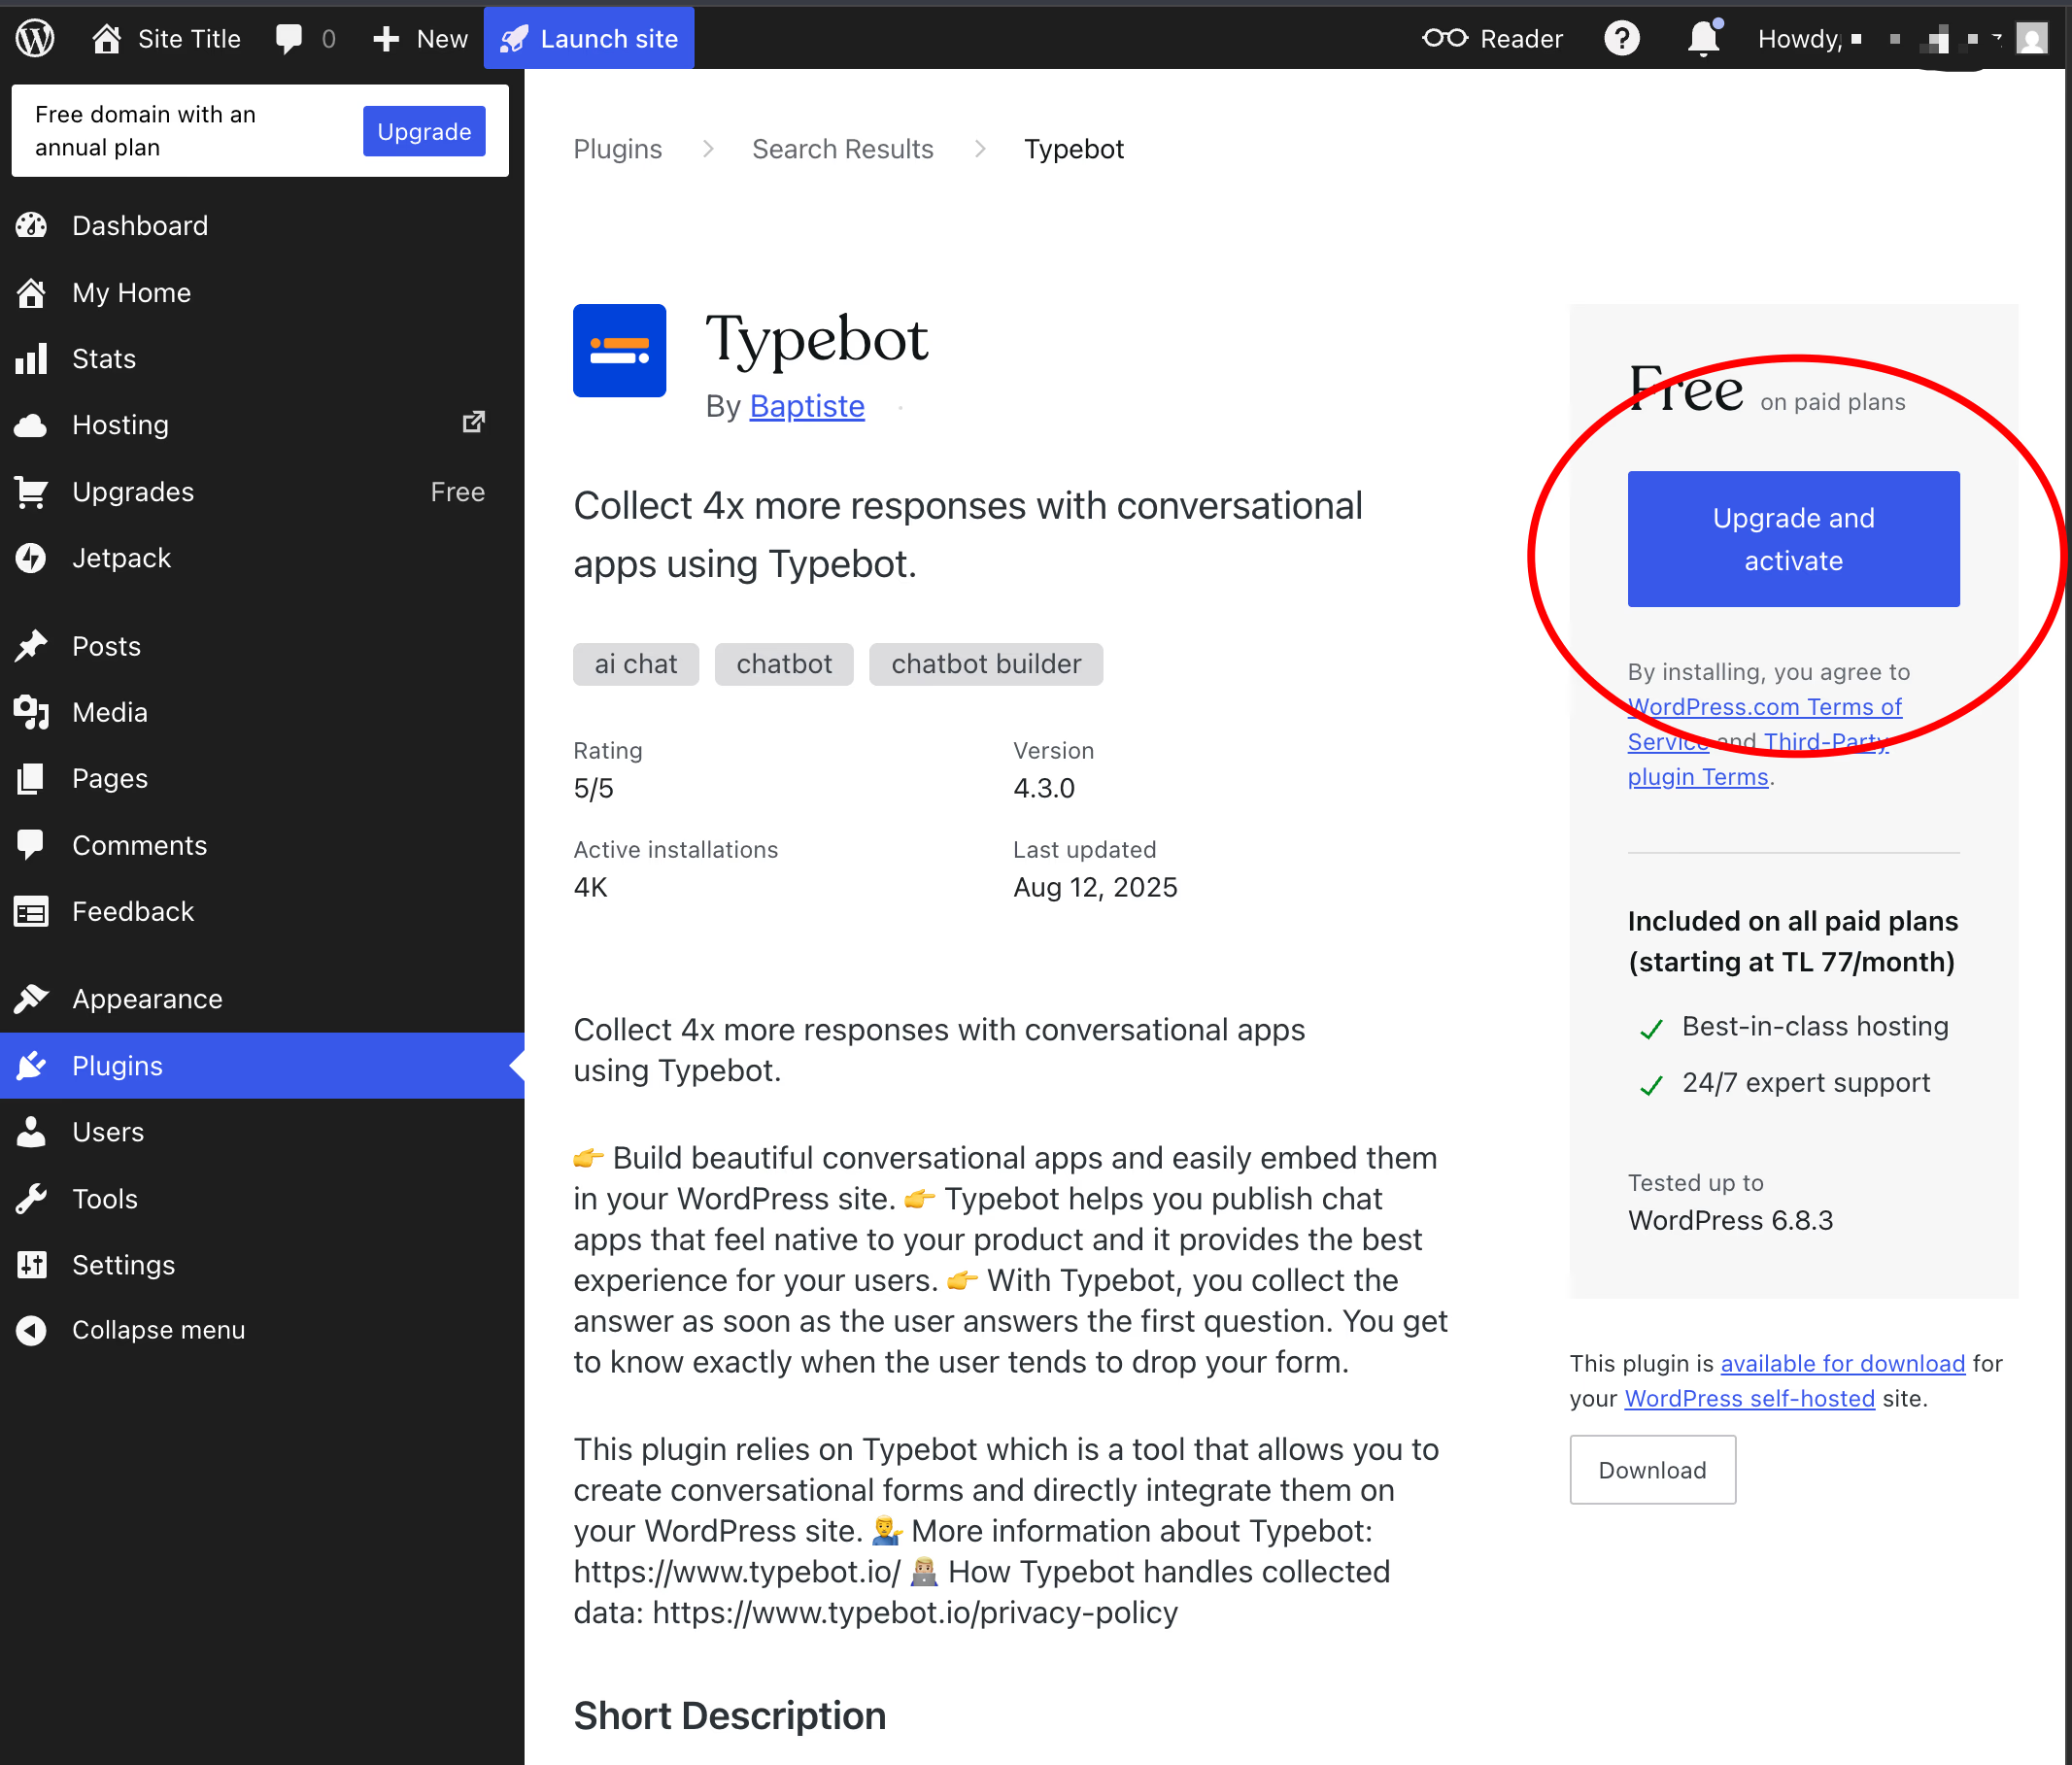
After activation, you will see Typebot in your WordPress admin menu, where you can access its settings. Now that WordPress is ready to load your bot, you need to get the exact embed snippet from Typebot.
Generate the WordPress code snippet in Typebot
Many people complicate this step, but Typebot makes it simple. You don’t have to write code or guess parameters. Here’s how:
- Open your bot in Typebot
- Publish the bot nad click the Share tab in the editor
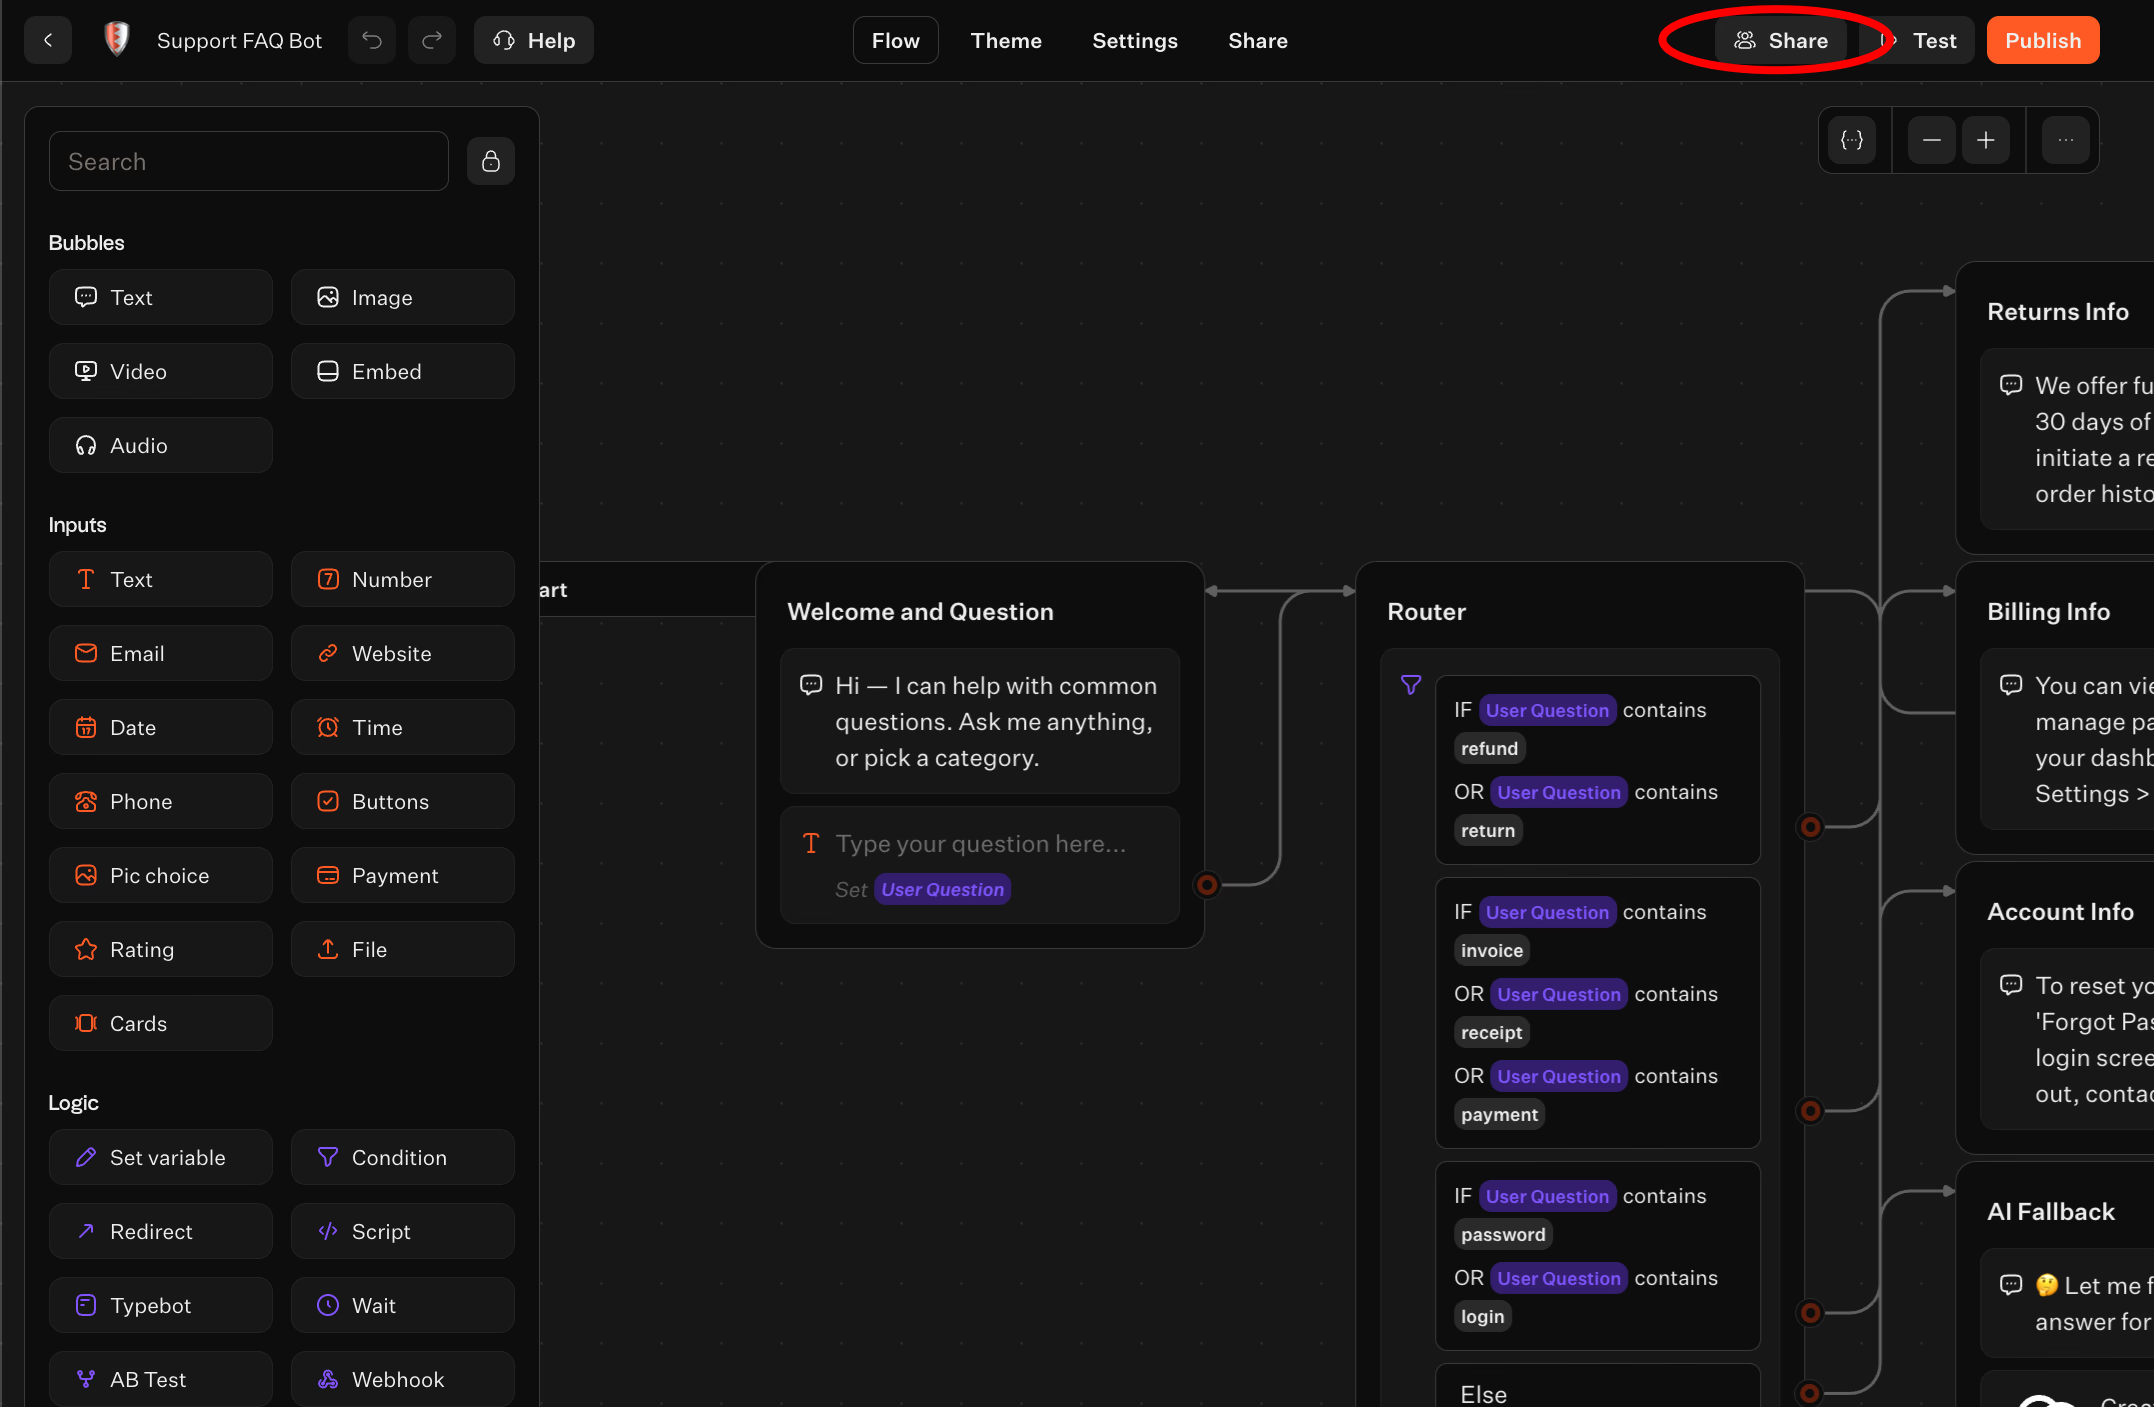
- Click the “WordPress” button
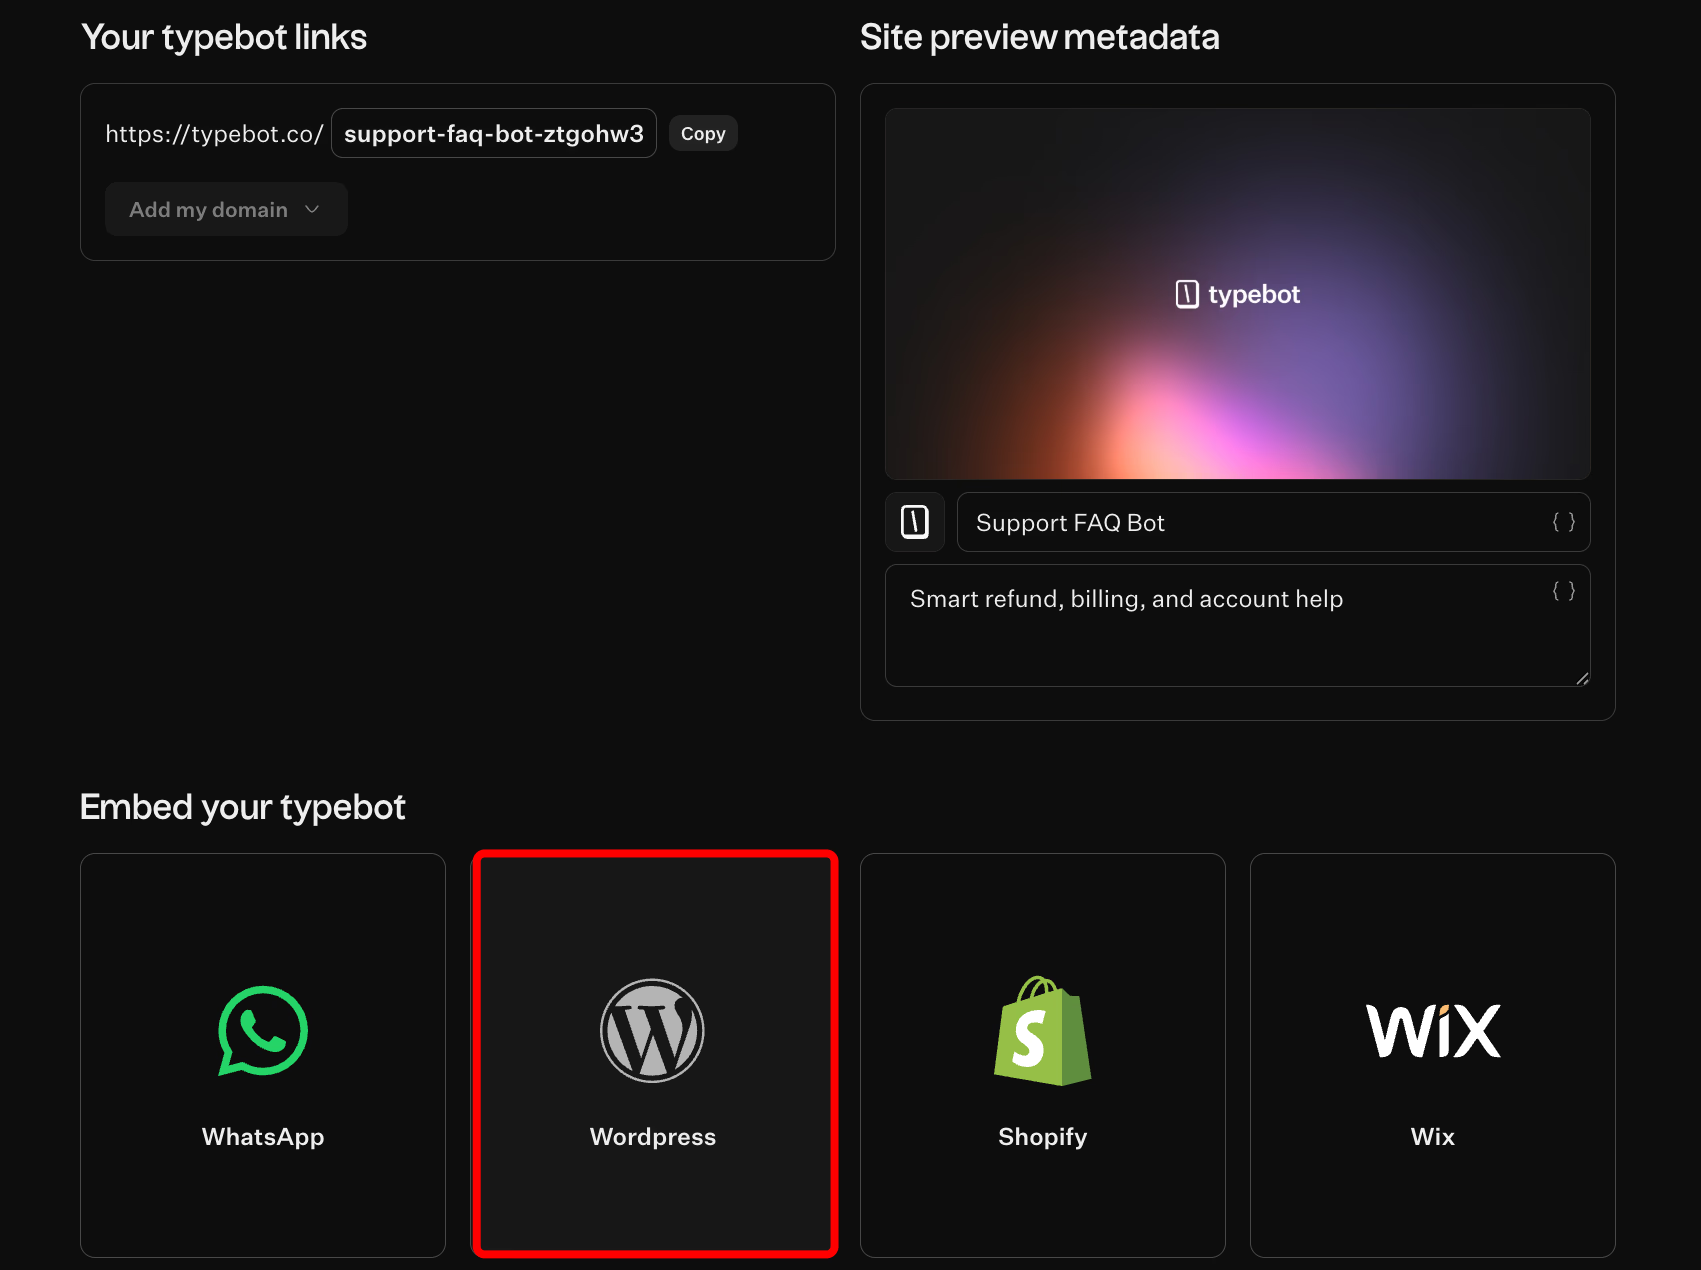
- Click Get Code Snippet, then copy the code Typebot generates
Keep the snippet ready to paste into WordPress.
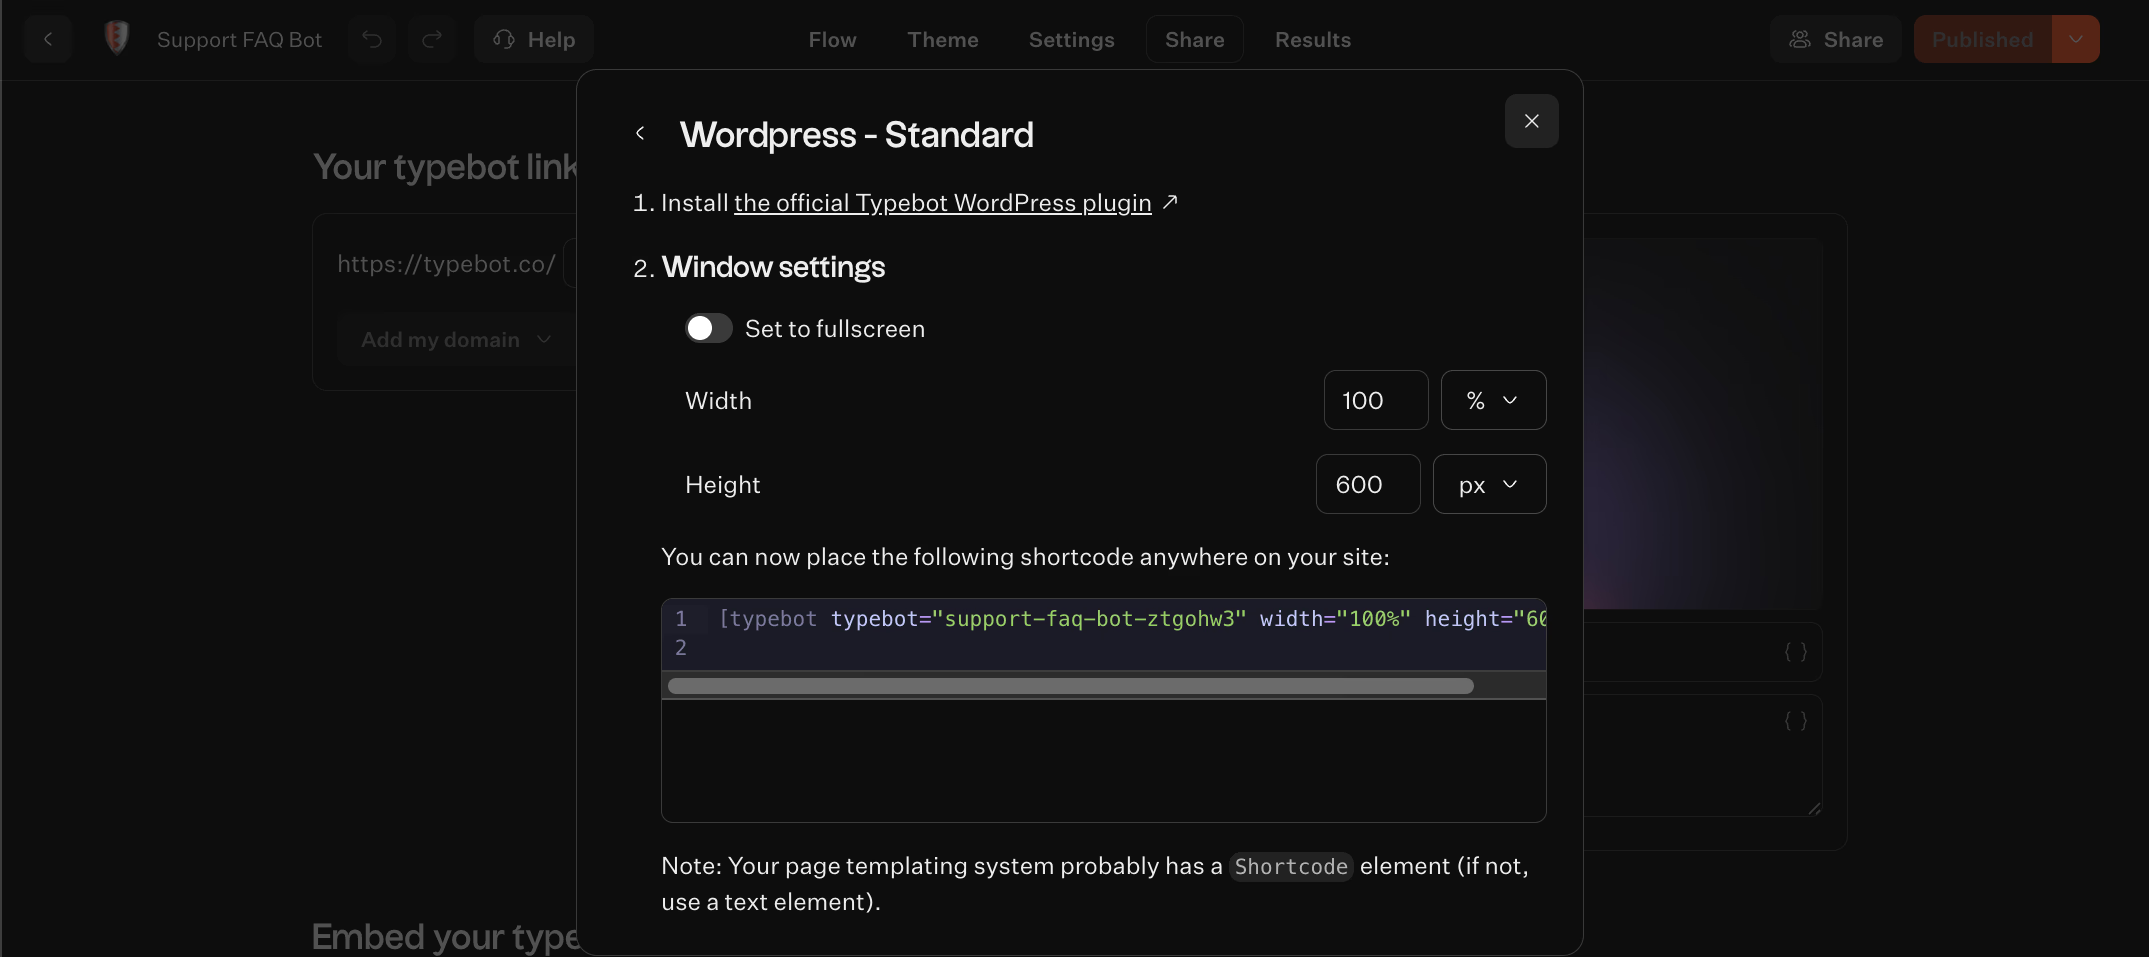
Paste the code snippet in WordPress settings and verify the bot appears
Return to WordPress and do the following:
- Go to Typebot from the left side bar
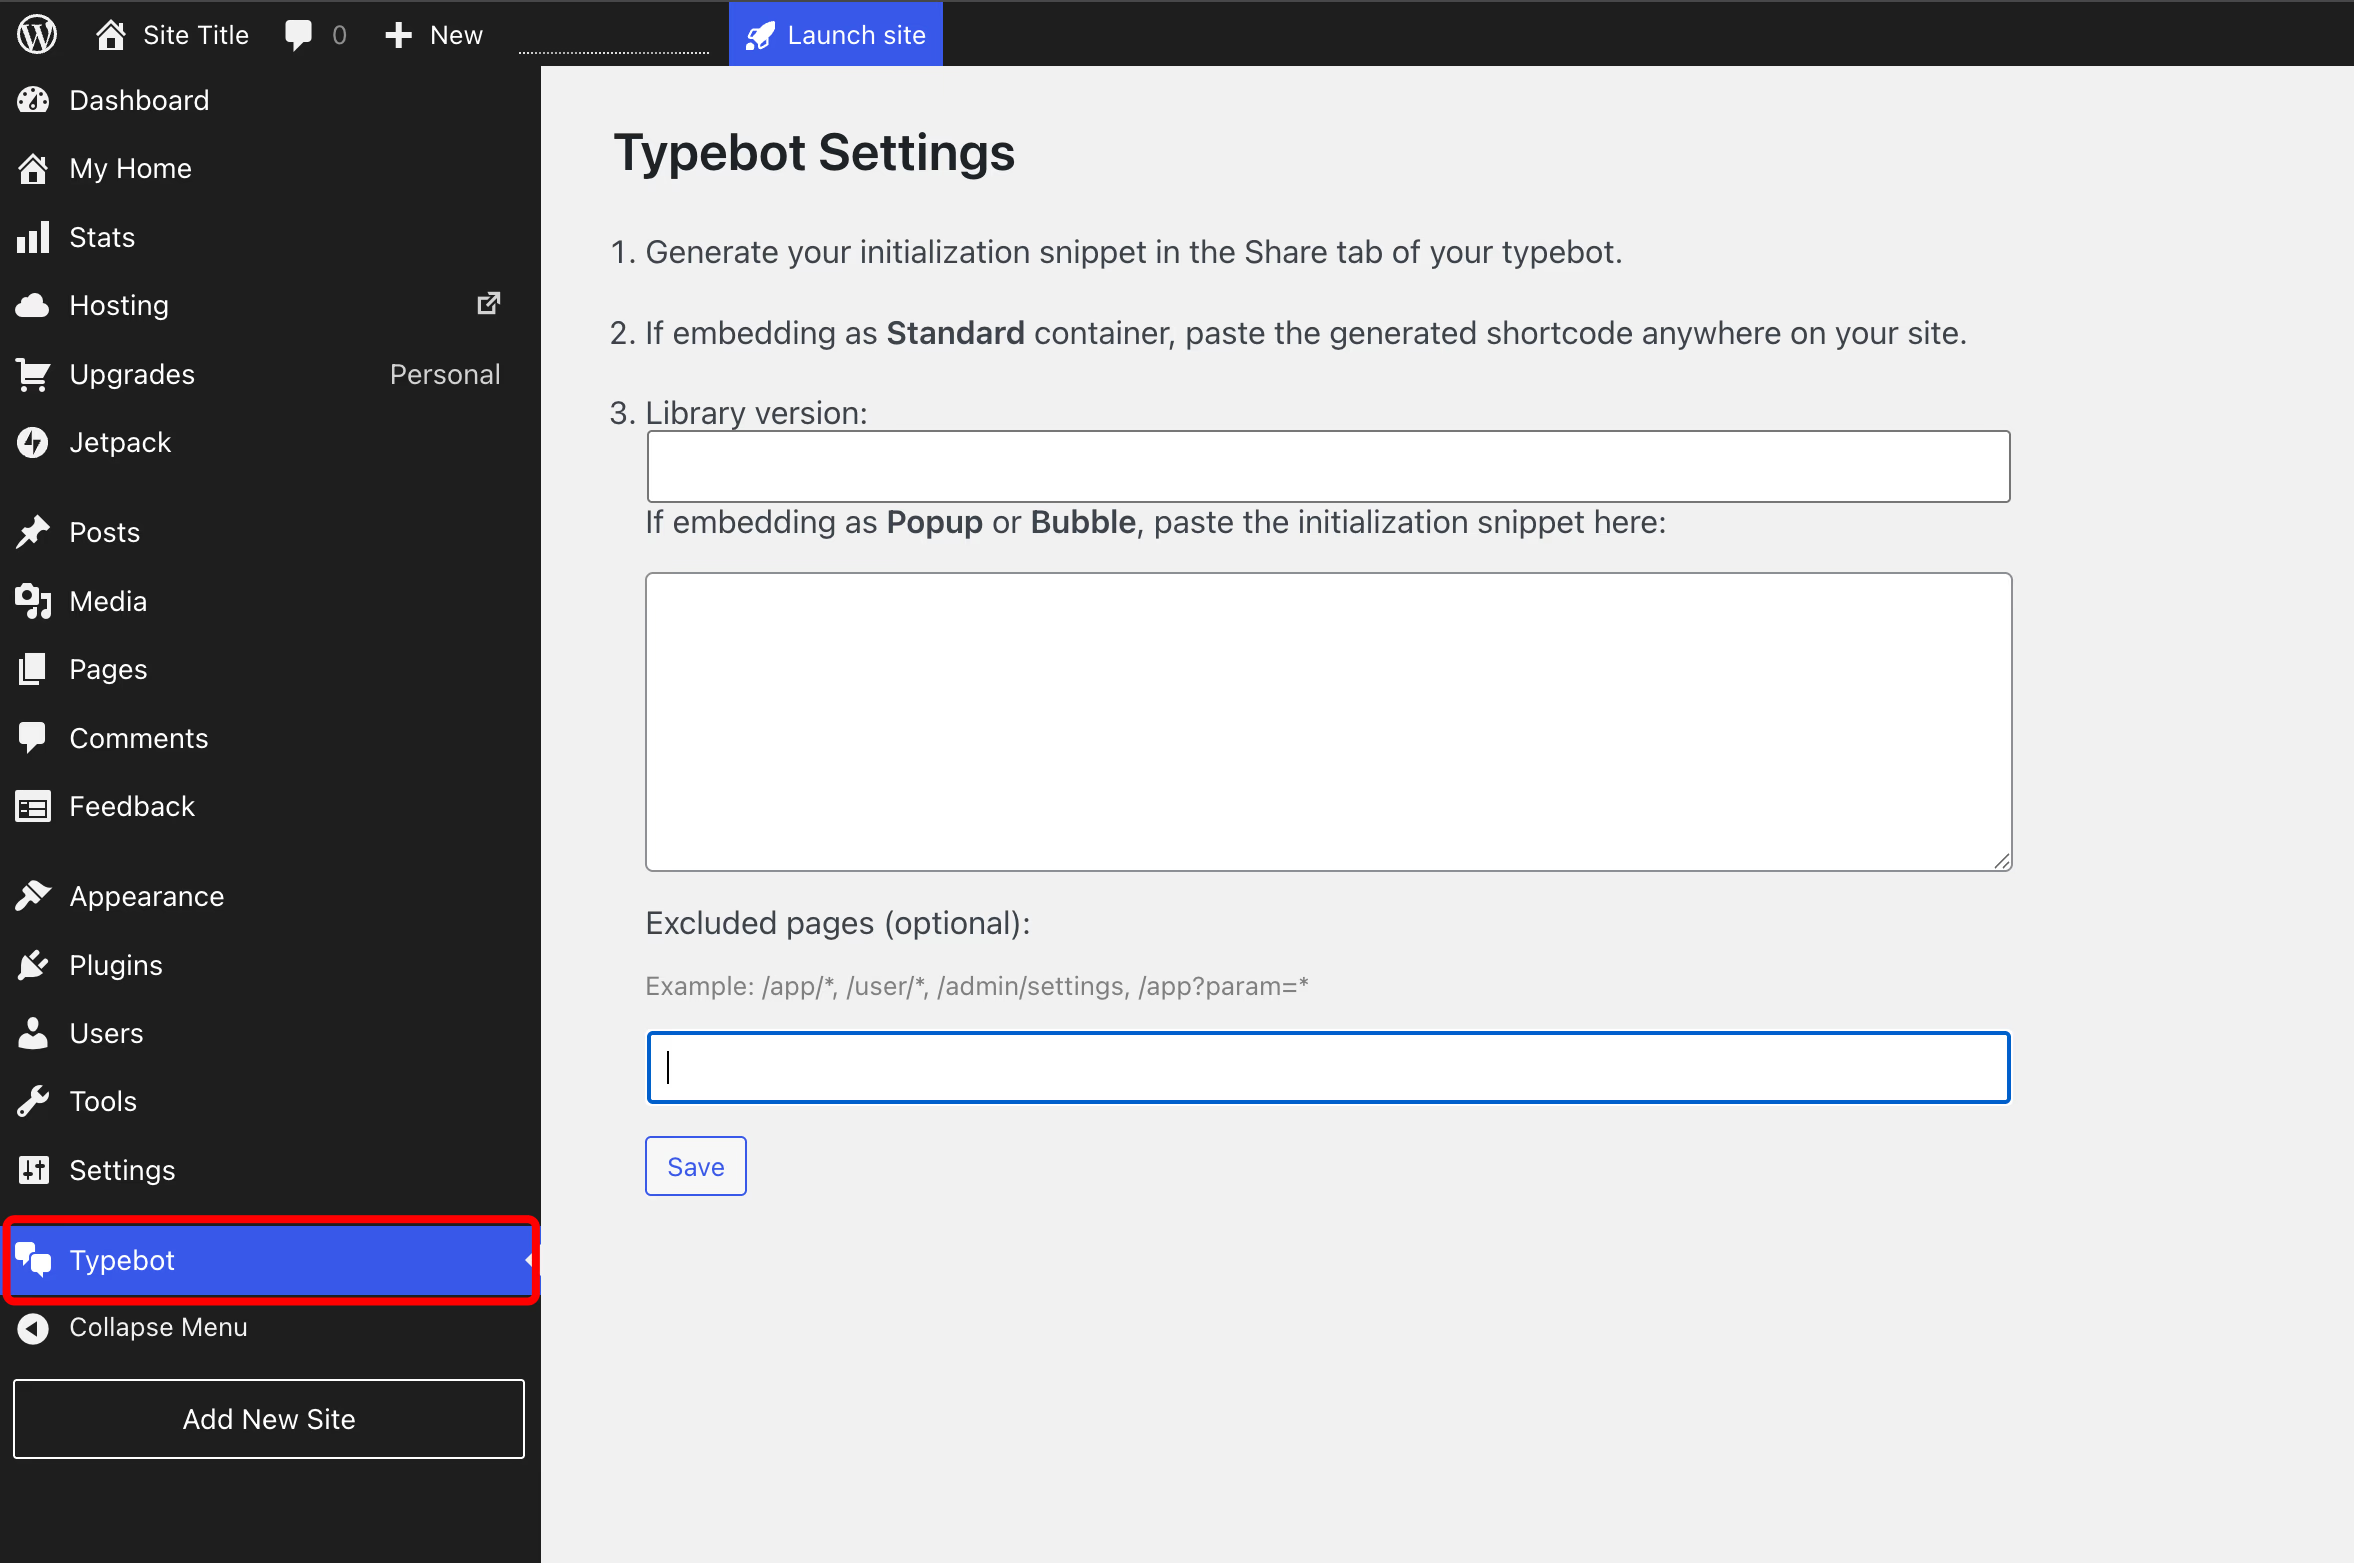
- Paste the copied snippet into the Code Snippet field.
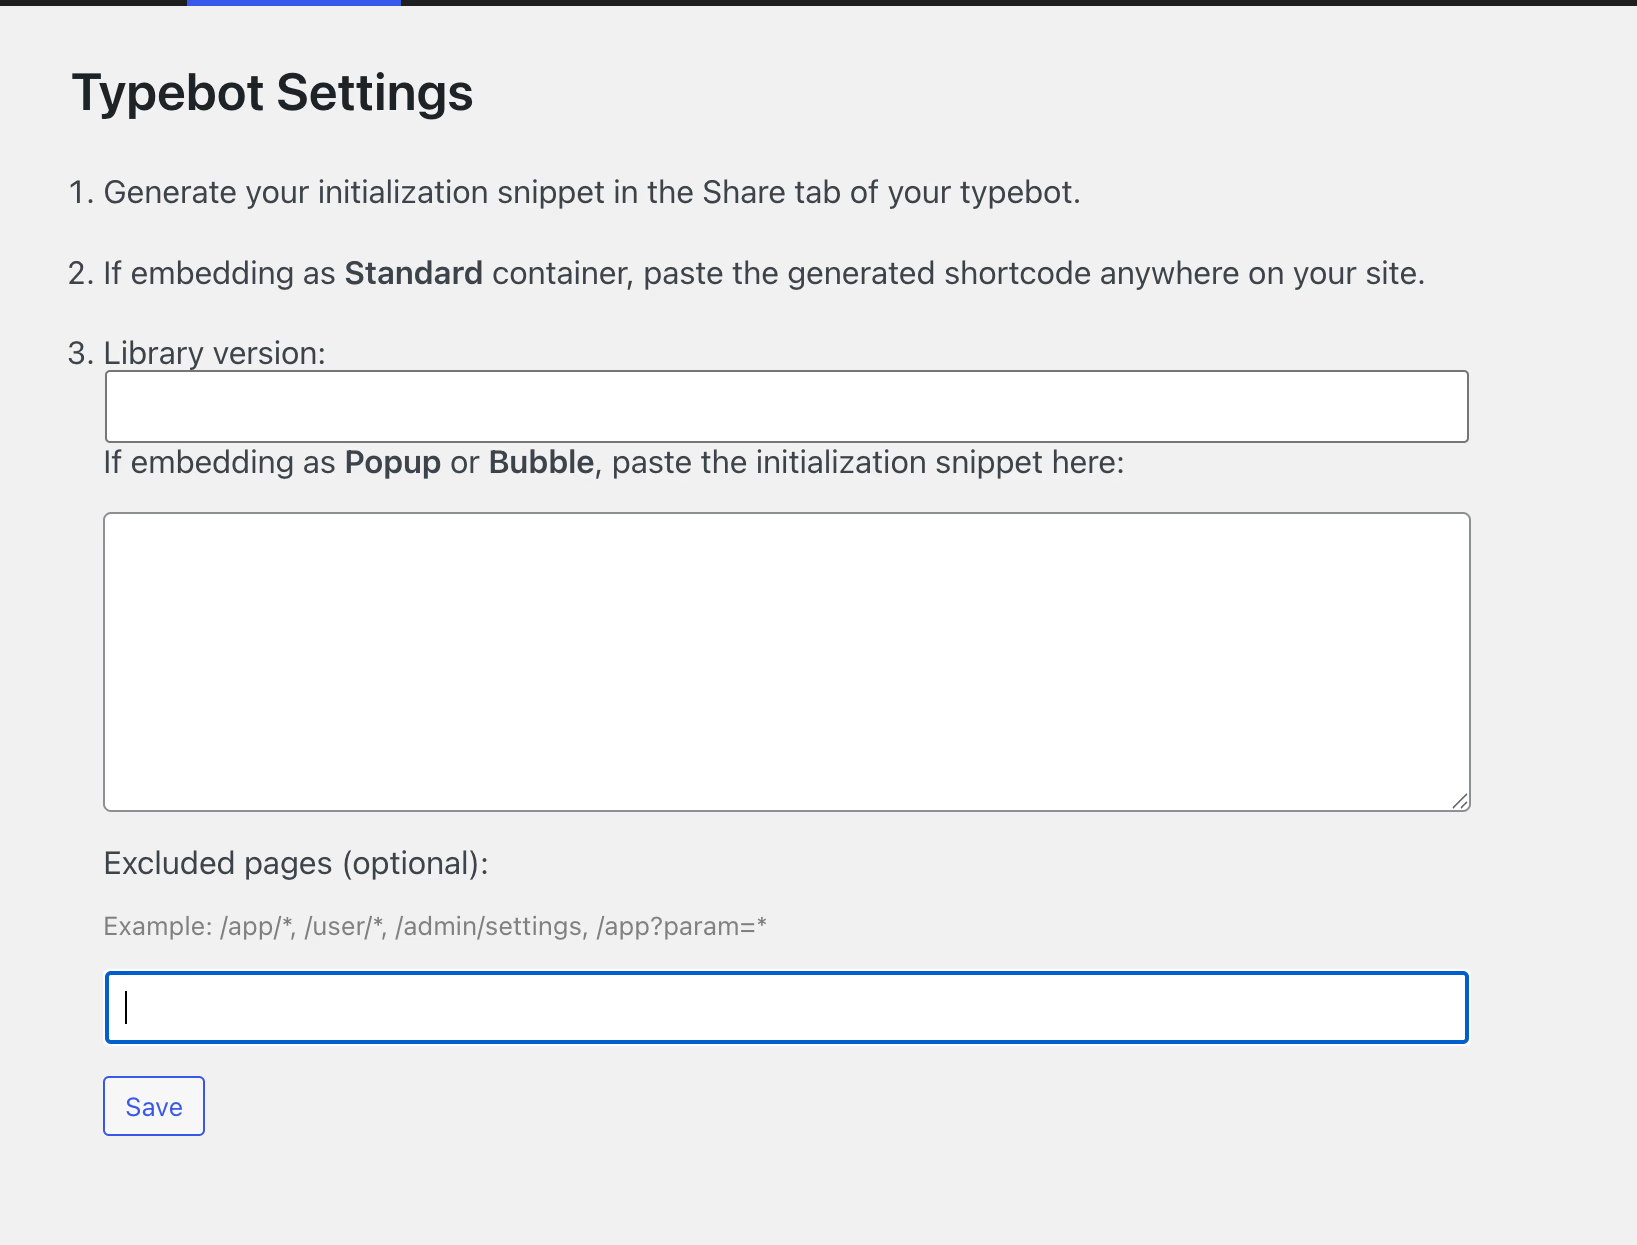
- If you see a Library version input, set it to
0.2. - Save your changes.
Open your site in a private or incognito window to avoid admin views. Make sure the chatbot loads and looks correct.
Test that the chatbot actually runs. Start a conversation and complete at least one full interaction to confirm functionality.
Basic setup checks before going live
Before launching your bot, perform this quick checklist to avoid common issues:
- Test the entire conversation flow: click through the main paths, including buttons, inputs, and branching logic.
- Check mobile responsiveness: view your site on a phone-sized screen. Ensure the bot is readable, tappable, and doesn’t hide important UI elements.
- Confirm integrations work: if your Typebot connected to tools like Google Sheets, submit a real test. Verify that the expected action completed downstream.
- Verify the bot appears on correct pages: at minimum, check your homepage and a high-traffic page. Later, you can control where the bot shows using excluded pages.
Pro Tip: If your chatbot doesn't appear after saving, clear your WordPress cache first. Caching plugins like WP Super Cache, W3 Total Cache, or LiteSpeed Cache often serve old versions of your pages. Clear the cache, then test in an incognito window to see the latest changes.
How to control where your WordPress chatbot appears for better UX
After embedding your Typebot, the quickest way to improve UX is deciding where not to show the chatbot.
In the left side bar click Typebot again. You’ll find an Excluded pages input. This is a simple, comma-separated list of URL patterns. If the current page matches one of these patterns, Typebot will not appear.
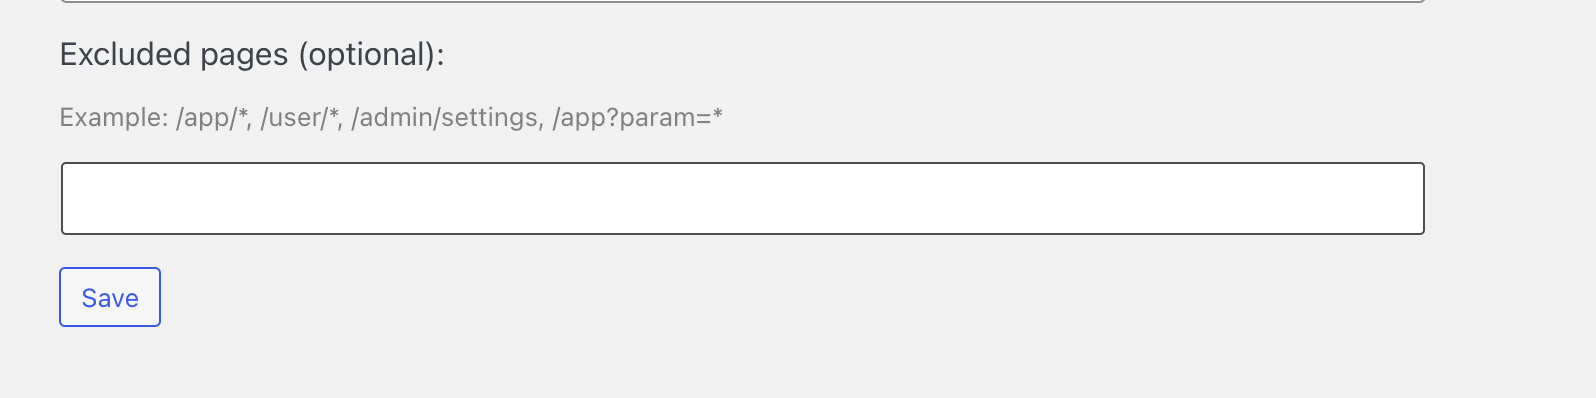
No complex toggles for each page or theme edits are needed. Just a few rules to protect user experience on pages where a chatbot would be distracting.
A useful way to think about this: your chatbot should show where people hesitate (questions, confusion, comparison). It should stay hidden where people act (pay, sign in, fill out a form).
Excluded pages examples for common WordPress needs
The plugin supports patterns that cover most cases: static pages, entire folders, and query parameters. Typebot documentation lists these behaviors with examples you can use:
/app/*excludes all pages starting with/app//appexcludes only the/apppage/app?param=1excludes/appwhen the query parameterparamequals1/app?param=*excludes/appwhen theparamquery parameter has any value/app/*?param=*excludes all pages under/app/whenparamis set
From experience:
- Use
/app/*to exclude a whole section like an app area, dashboard, docs, or knowledge base. - Use
/appto hide the chatbot on one specific page but keep it nearby. - Query parameter rules work well when a page changes mode based on URL parameters.
When to exclude pages
Excluding pages doesn’t mean hiding the chatbot everywhere. It means reducing distractions where focus matters most. Common places to keep the chatbot quiet include:
- Checkout and payment steps: chat bubbles here risk misclicks. If support is necessary, provide a clear help link or separate support step. This works better than an always-on widget that competes with your checkout forms.
- Account, sign-in, and password reset flows: these require high focus. If your chatbot supports onboarding or sales, it may feel out of place here. It’s better to direct users to dedicated help experiences.
- App dashboards or logged-in product areas: if your site includes an
/app/section, exclusion patterns like/app/*prevent the chatbot from adding visual noise. Because UI guidance already exists. - Ultra-focused landing pages: landing pages often have one clear goal with a single CTA. Exclude the chatbot if it’s not part of this path. If it is, make sure its first message matches the landing page’s promise.
To keep exclusions manageable, list them in one line as a comma-separated set, for example:
/app/*, /account, /checkout
Use your site’s actual paths. The objective is a chatbot that feels intentional. Present where it clarifies, absent where it distracts. Next, you can enhance this by passing WordPress user data into Typebot to personalize conversations.
Start Small Tip: Don't overthink exclusions on day one. Start with just checkout and login pages, then check your analytics after a week. If the chatbot has low engagement or high bounce on specific pages, add those to the exclusion list. Iterate based on real data, not guesses.
How to personalize your WordPress chatbot using WP variables
Most WordPress chatbots feel generic because they start every conversation without context. Typebot’s WordPress plugin lets you begin the chat with relevant user information. It passes prefilled variables from WordPress into your Typebot, allowing the chatbot to:
- Adapt its wording
- Skip redundant questions
- Appear to “already know” the user
This approach transforms your chatbot from a simple website widget into a lightweight onboarding layer. For example, instead of asking email early in the conversation, your Typebot can use the information WordPress already has. With that, you can move straight to more valuable questions.
Some practical uses include:
- Greeting logged-in users with a personalized message and tailoring the conversation flow, which reduces friction quickly
- Offering a generic experience to users who aren’t logged in and collecting necessary info through Typebot inputs
How to set up prefilled variables correctly
The setup requires strict adherence to exact variable names. It’s simple but precise: the variable name must match exactly for it to work. No approximations or misspellings.
Follow these steps:
- Use the WordPress Typebot plugin Prefilled variables work only when embedded via the native WordPress plugin, not with random embeds.
- Create variables in Typebot first In the Typebot editor, open the variables dropdown and declare the variables you want to receive from WordPress.
- Match the exact variable syntax WordPress expects
For example, the email variable must be spelled exactly:
WP Email - Publish and test using a real WordPress page Don’t rely only on the preview. Open the actual WordPress page where you embedded the bot and verify the variable is available in the conversation. You can temporarily display it in a message to confirm.
A helpful testing tip: add a debug message like “Debug: your email is {{WP Email}}” at the start of the flow. Check it on your site, then remove the message.
Common variable naming mistakes that prevent personalization from working
Most failures happen because software requires exact, case-sensitive matching, while people read with more flexibility. Typebot’s WordPress variable names are case- and character-sensitive. For example:
WP EmailworksWp Emaildoesn’t workWP emaildoesn’t work
If personalization isn’t working, check the variable names letter-by-letter instead of rewriting your flow. When you get this right, personalization becomes seamless and reusable. You can start every new flow with the same baseline context without adding extra inputs or steps.
If you want to go beyond basic personalization, consider how chatbots can automate follow-up actions based on user responses. Learn more about marketing automation with chatbots to unlock the full potential of your WordPress bot.
How to design and customize the chatbot in Typebot before embedding in WordPress
To make your WordPress chatbot feel natural, start in Typebot’s editor. This is where you control the pace, questions, and user experience details that keep visitors engaged.
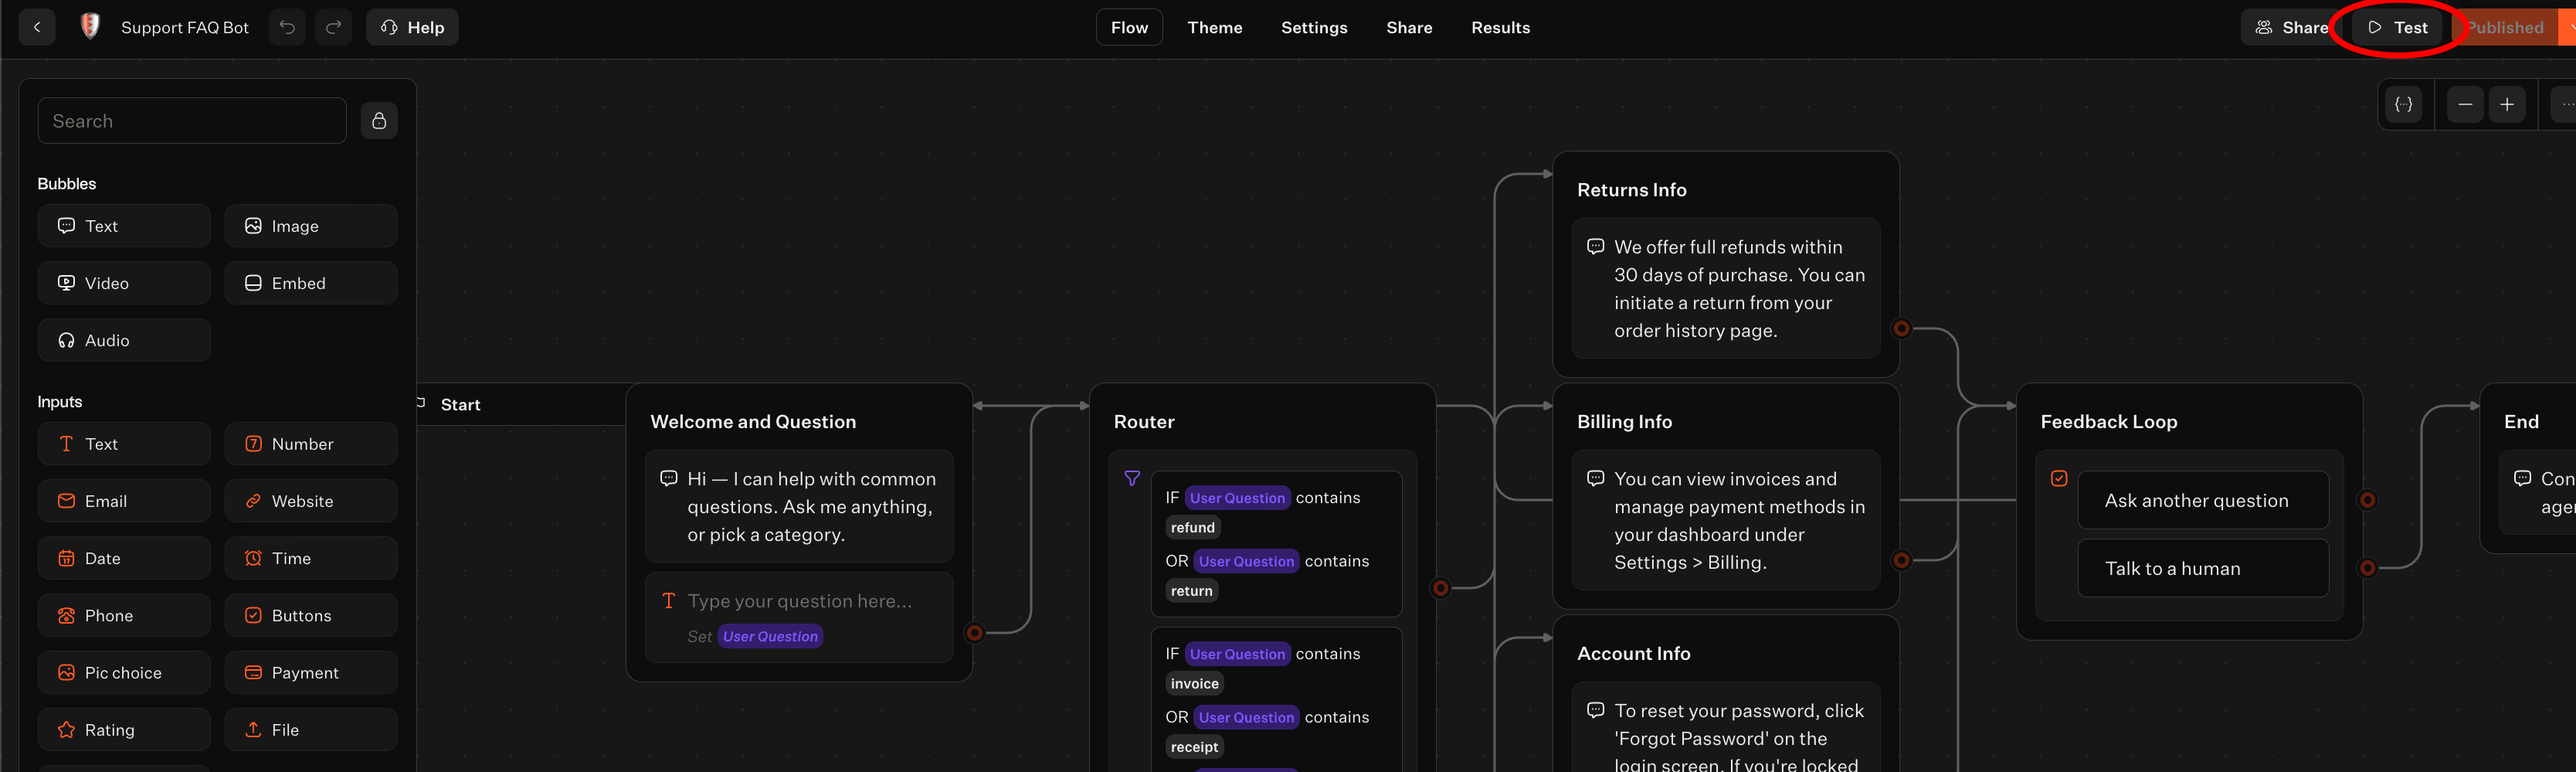
When you open a Typebot, you’ll find four main tabs at the top. Flow, Theme, Settings, and Share. You’ll spend most of your time in Flow to build the conversation.
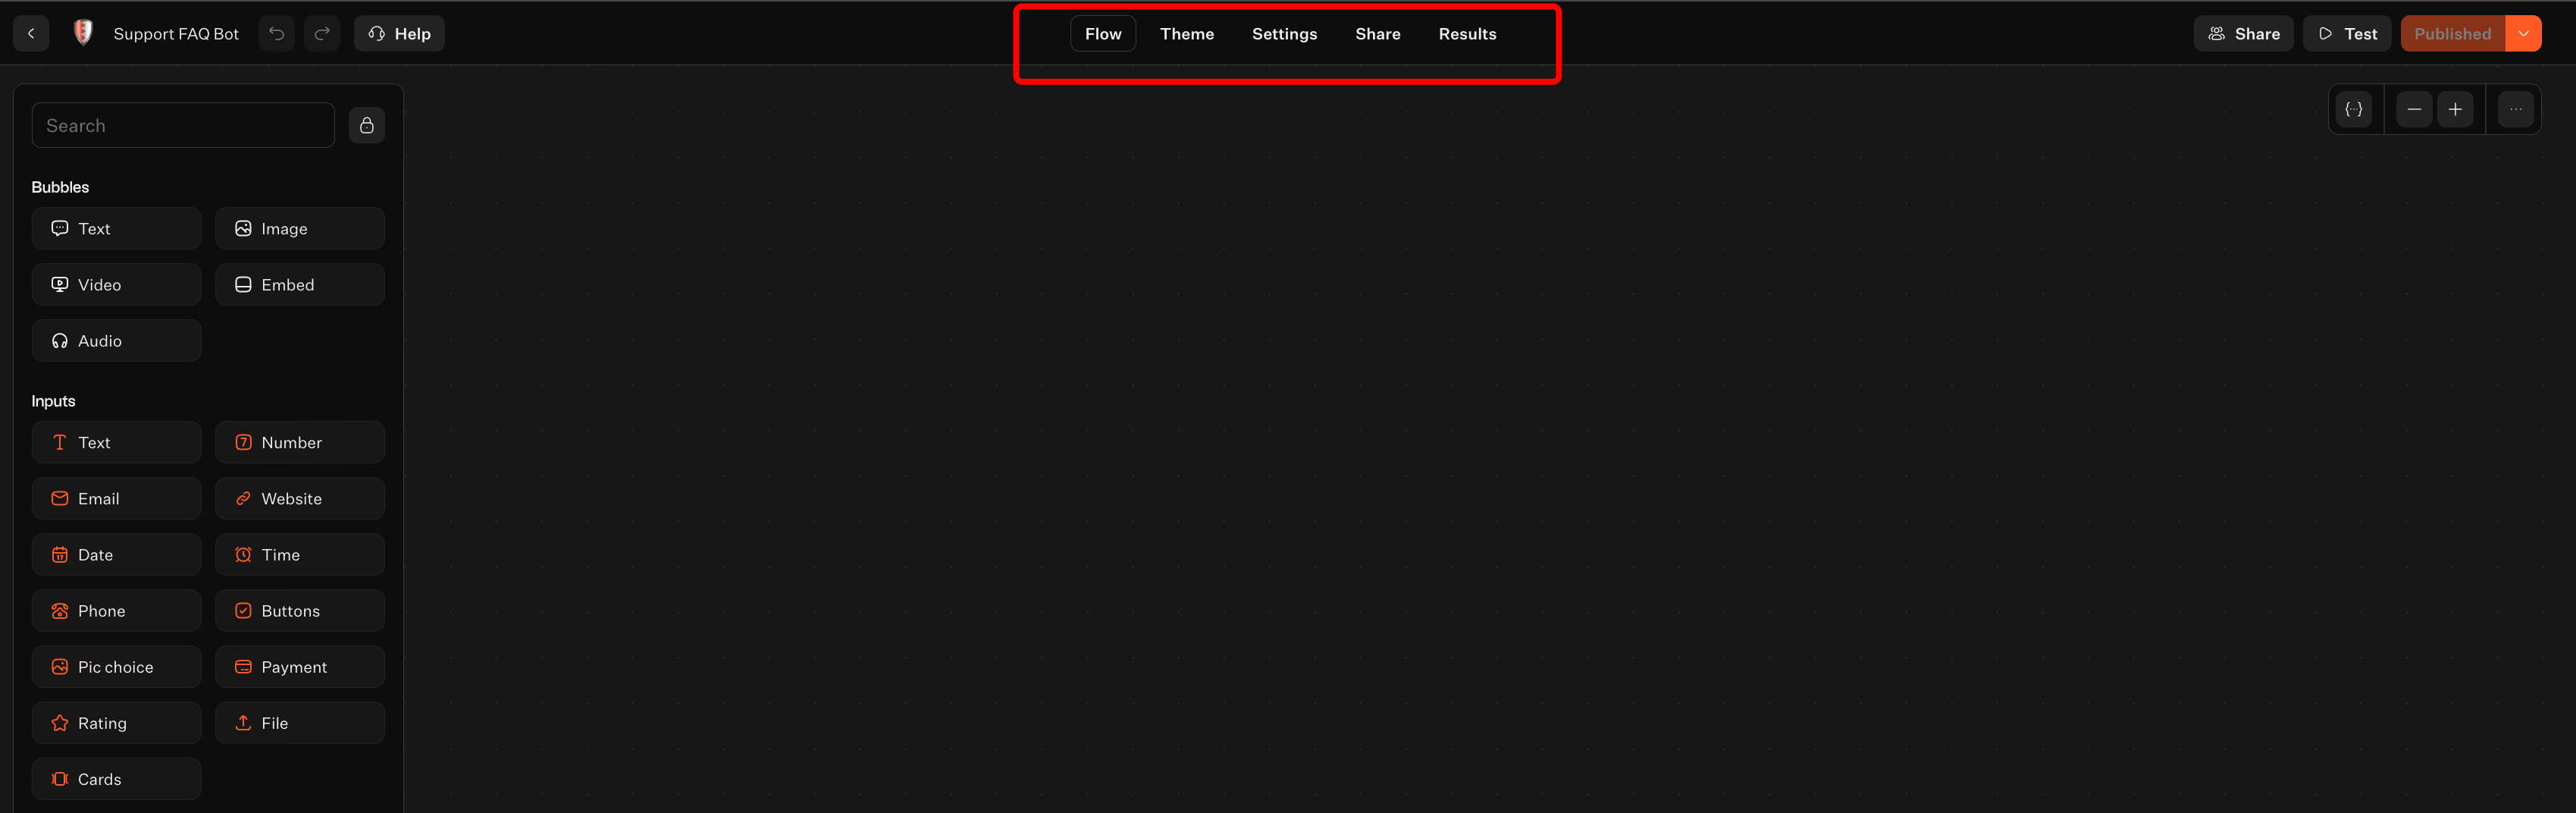
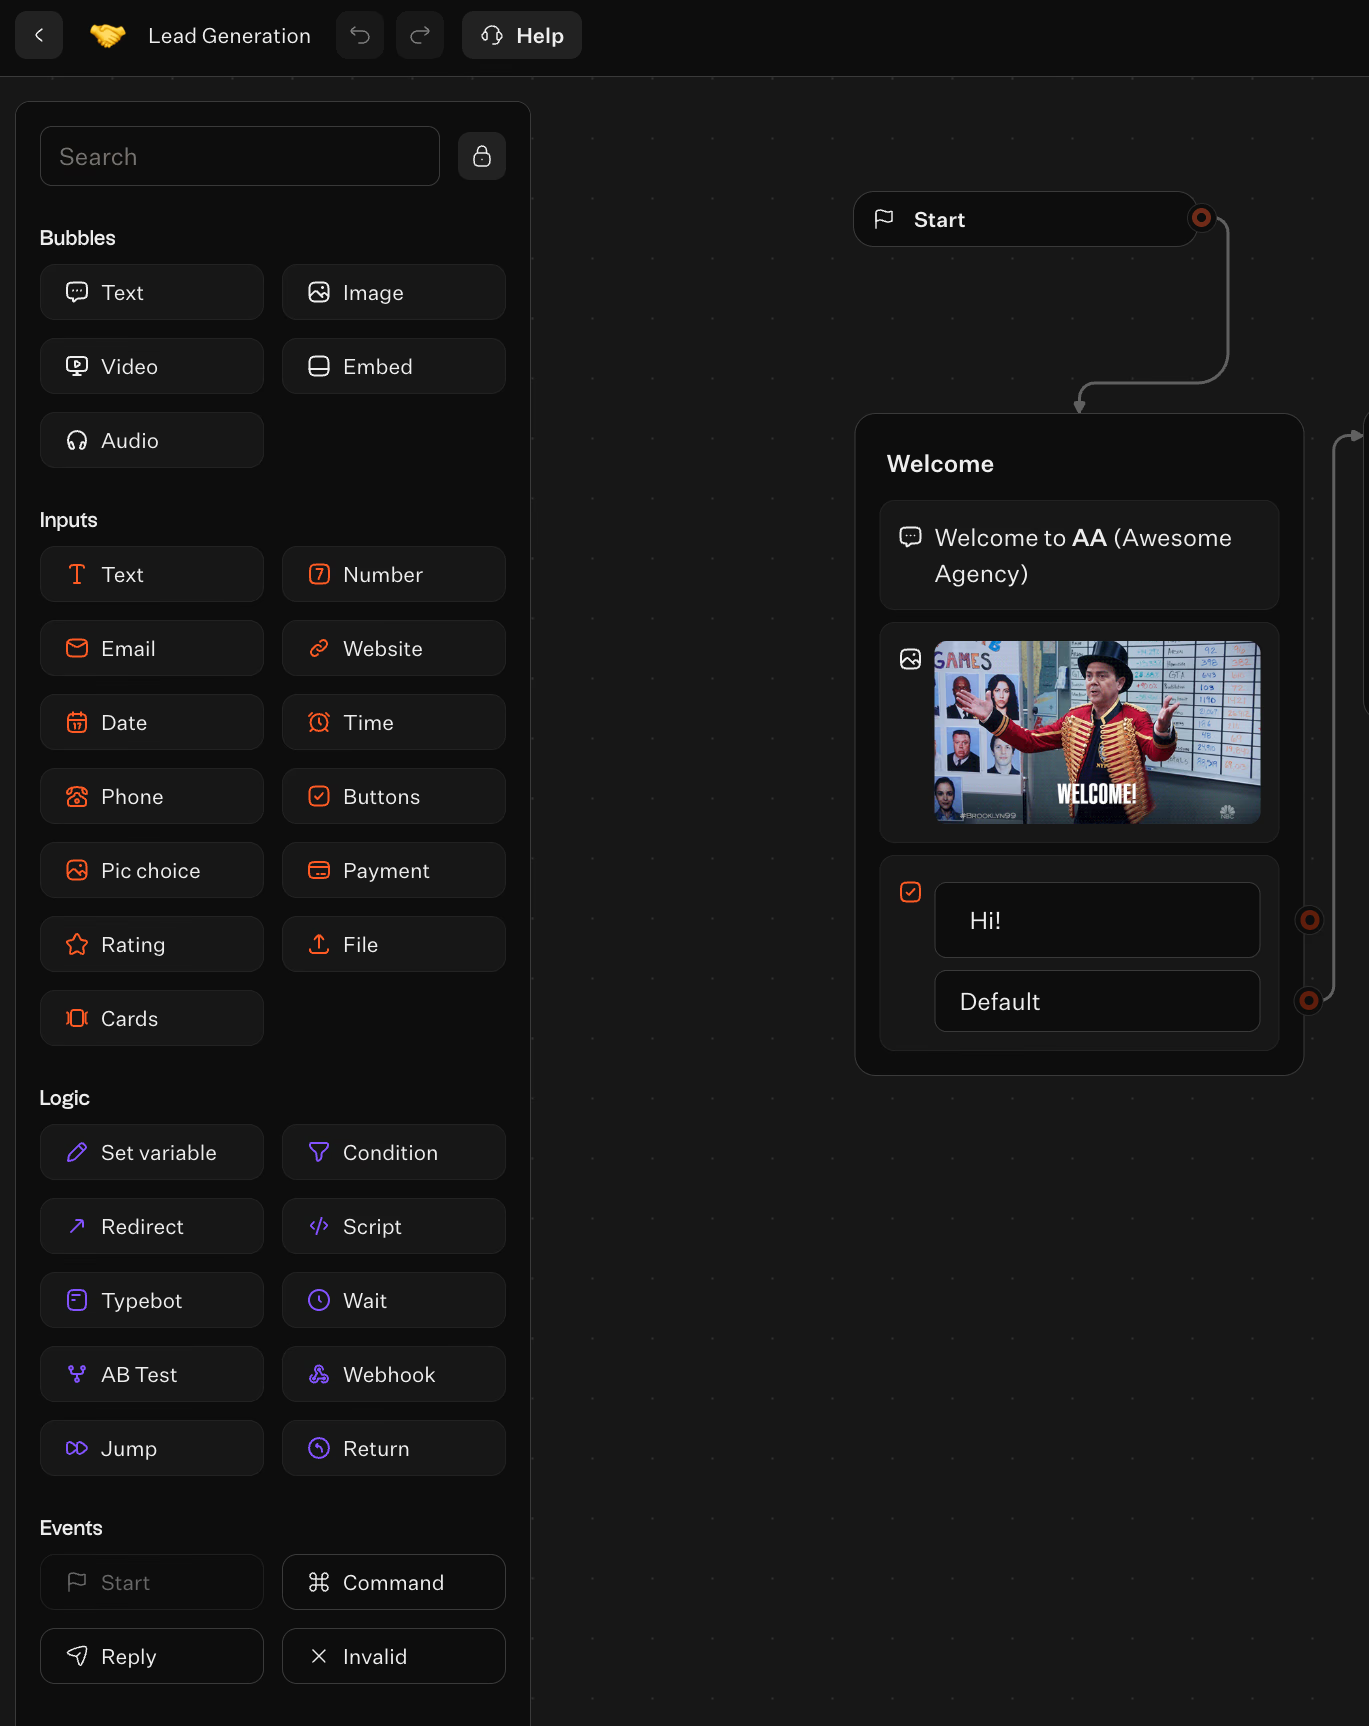
Typebot’s left panel offers a library of blocks you can drag into your flow. Most chatbots use a simple structure made from:
- Several Text bubbles to provide context and clarity.
- One input at a time to reduce friction, such as email, phone, or buttons.
- Occasional richer elements, like Image, Video, Embed, or Audio, when visuals add more value than text.
The block categories are organized as:
- Bubbles: Text, Image, Video, Embed, Audio
- Inputs: Text, Number, Email, Website, Date, Time, Phone, Buttons, Picture choice, Payment, Rating, File, Cards
- Logic: Set variable, Condition, Redirect, Script, Typebot, Wait, A/B Test, Webhook, Jump, Return
- Events: Start, Command, Reply, Invalid
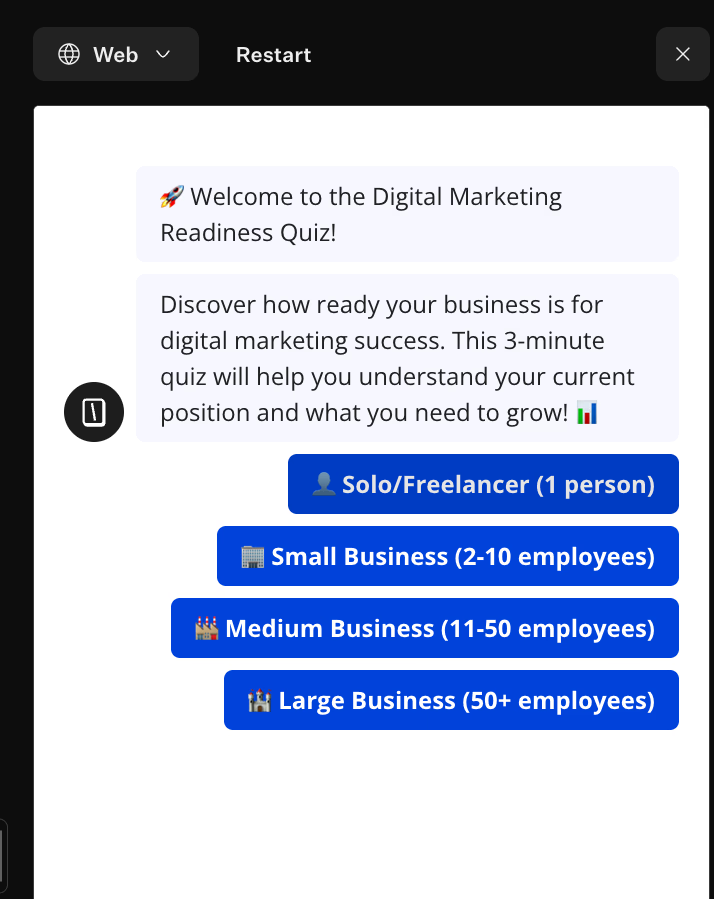
A practical approach to designing your first WordPress-ready flow is dividing it into three short phases:
- Opening (5–15 seconds): a clear welcome plus one question.
- Intent capture (1–3 interactions): use buttons or a single input to understand visitor needs.
- Resolution path: provide answers, routes, or collect further details.
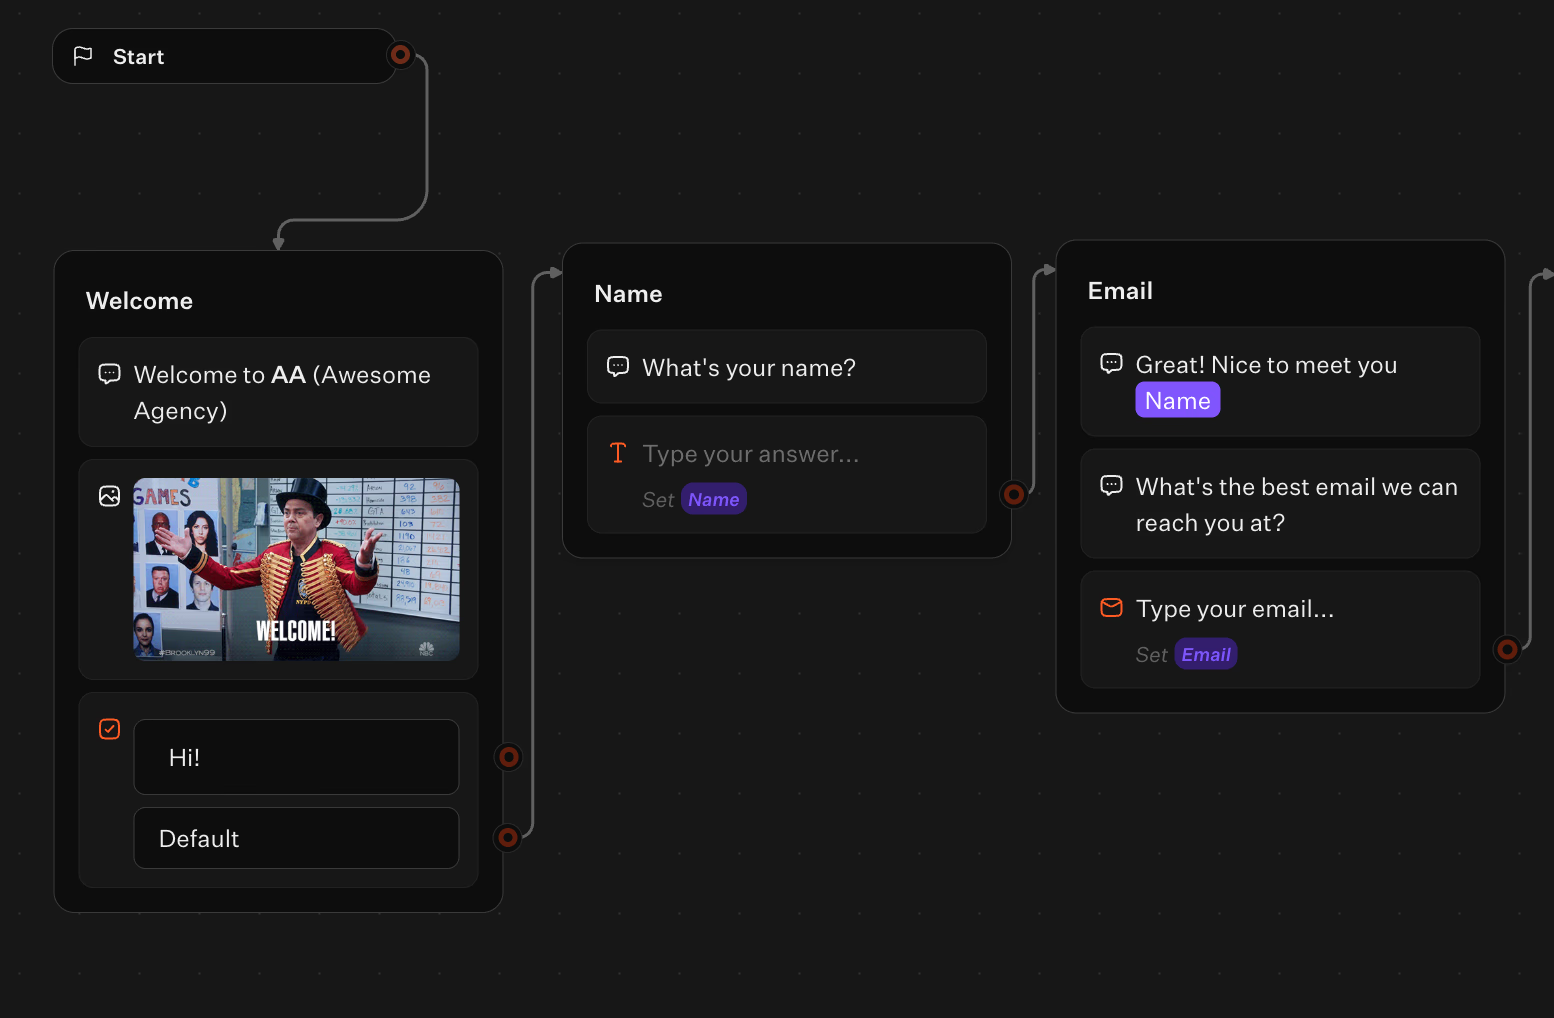
This keeps the bot feeling quick and efficient. Since visitors come to your site to get things done, a fast chatbot improves their experience. Use Buttons early whenever possible because tapping is easier than typing on most visits.
Eliminate the need for developers—build your bot in minutes.
No trial. Generous free plan.
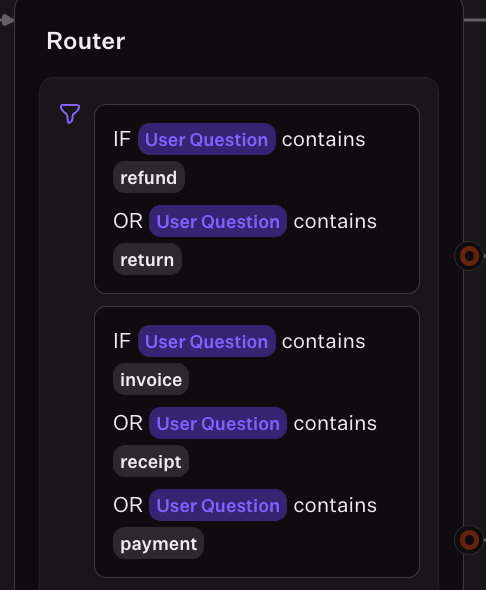
Use conditional logic to create branching conversation paths
After your basic flow works in a straight line, add conditional logic to make it a real assistant. This is especially useful when building an FAQ chatbot that handles multiple topics. In Typebot, a Condition block lets you branch the conversation based on user responses.
This lets you create one chatbot that behaves like several without duplicating flows. A common pattern includes:
- Asking for intent with Buttons
- Storing or using the choice immediately
- Using a Condition block to send users down the right path
As an example, presenting four options and then giving each option its own path helps the chatbot replace navigation menus more effectively.
Typebot also offers Jump and Return blocks, which let you reuse parts of the flow, like the same lead-capture sequence across multiple branches. Reducing repetition makes maintenance easier.
While building, click the Test button in the editor’s top bar. It opens a sidebar to simulate the chatbot, helping you find dead ends before your visitors do.
Add integrations like webhook, OpenAI, and Google Sheets to automate workflows
A WordPress chatbot becomes useful when it sends data or triggers actions. Typebot supports this through built-in integration blocks rather than add-ons. Three key integration types cover many cases:
- Webhook for “connect anything” workflows
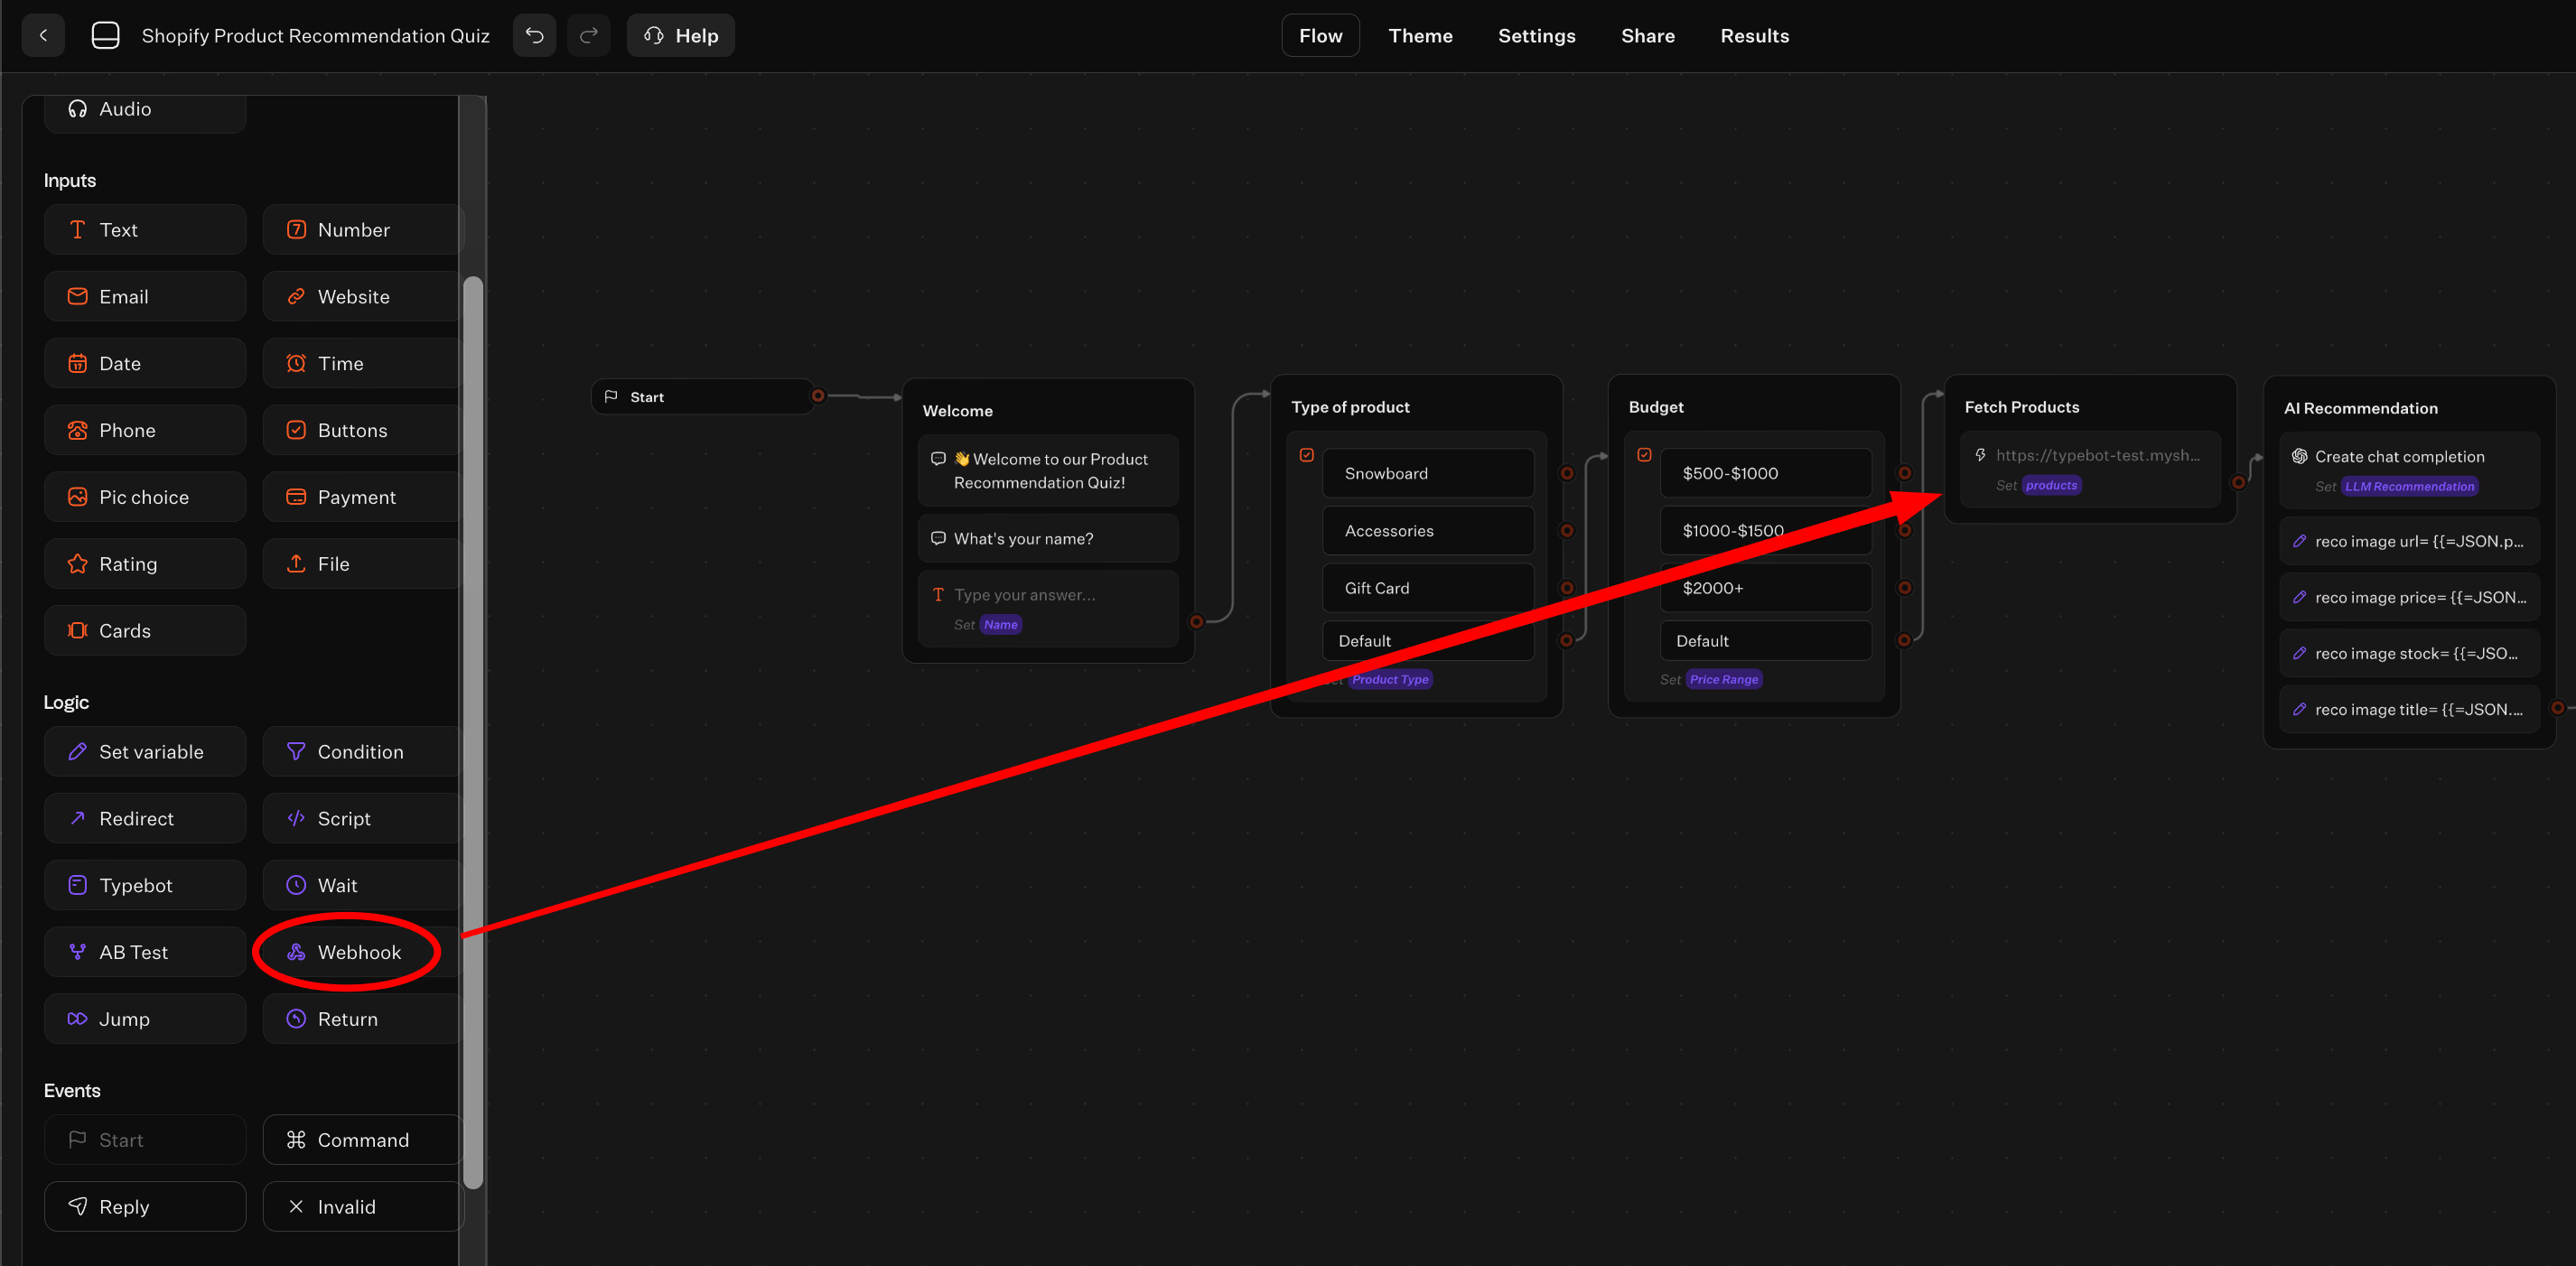
If you don’t find a direct integration, the webhook handles universal connections. Inside Logic blocks, the Webhook block sends visitor inputs to other services via HTTP. This helps teams link Typebot to custom backends or internal tools without changing the chatbot. Here is an example:
- OpenAI for smarter answers
AI integrations like OpenAI provide flexible responses beyond rule-based bots. You can even train chatbot on your own data for personalized answers. Use AI where it simplifies the experience, such as:
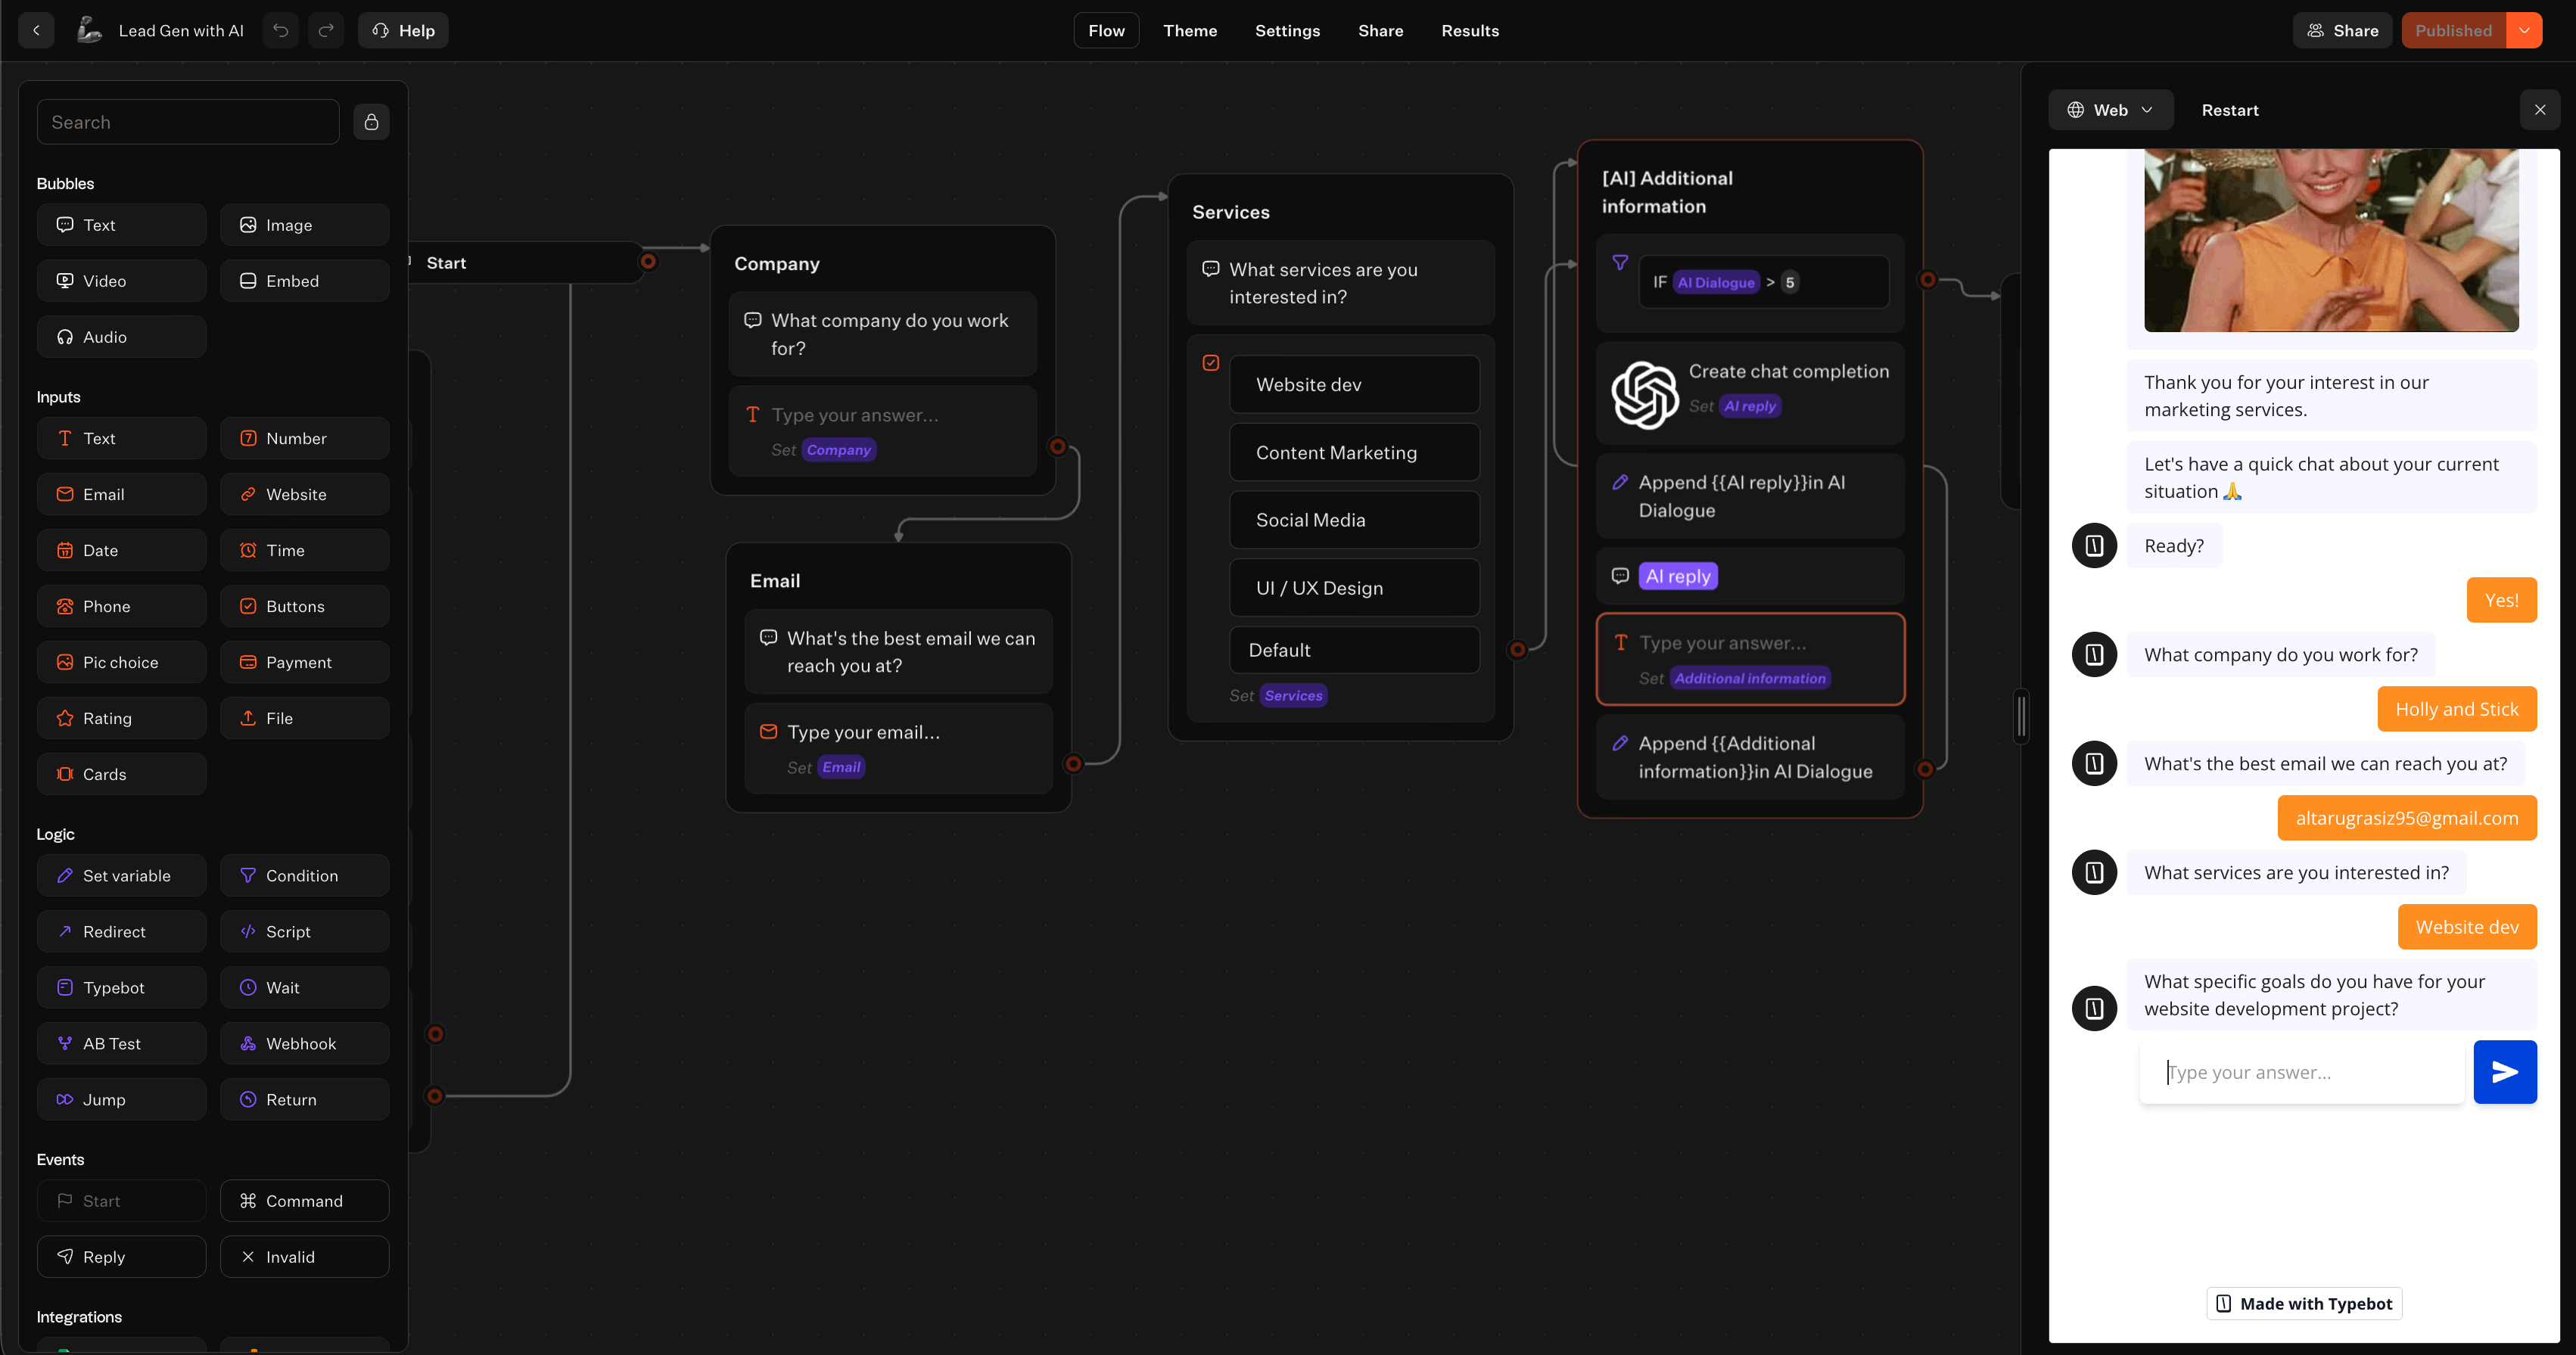
- Handling open-ended questions
- Summarizing user input
- Generating answers that would otherwise need many FAQ branches
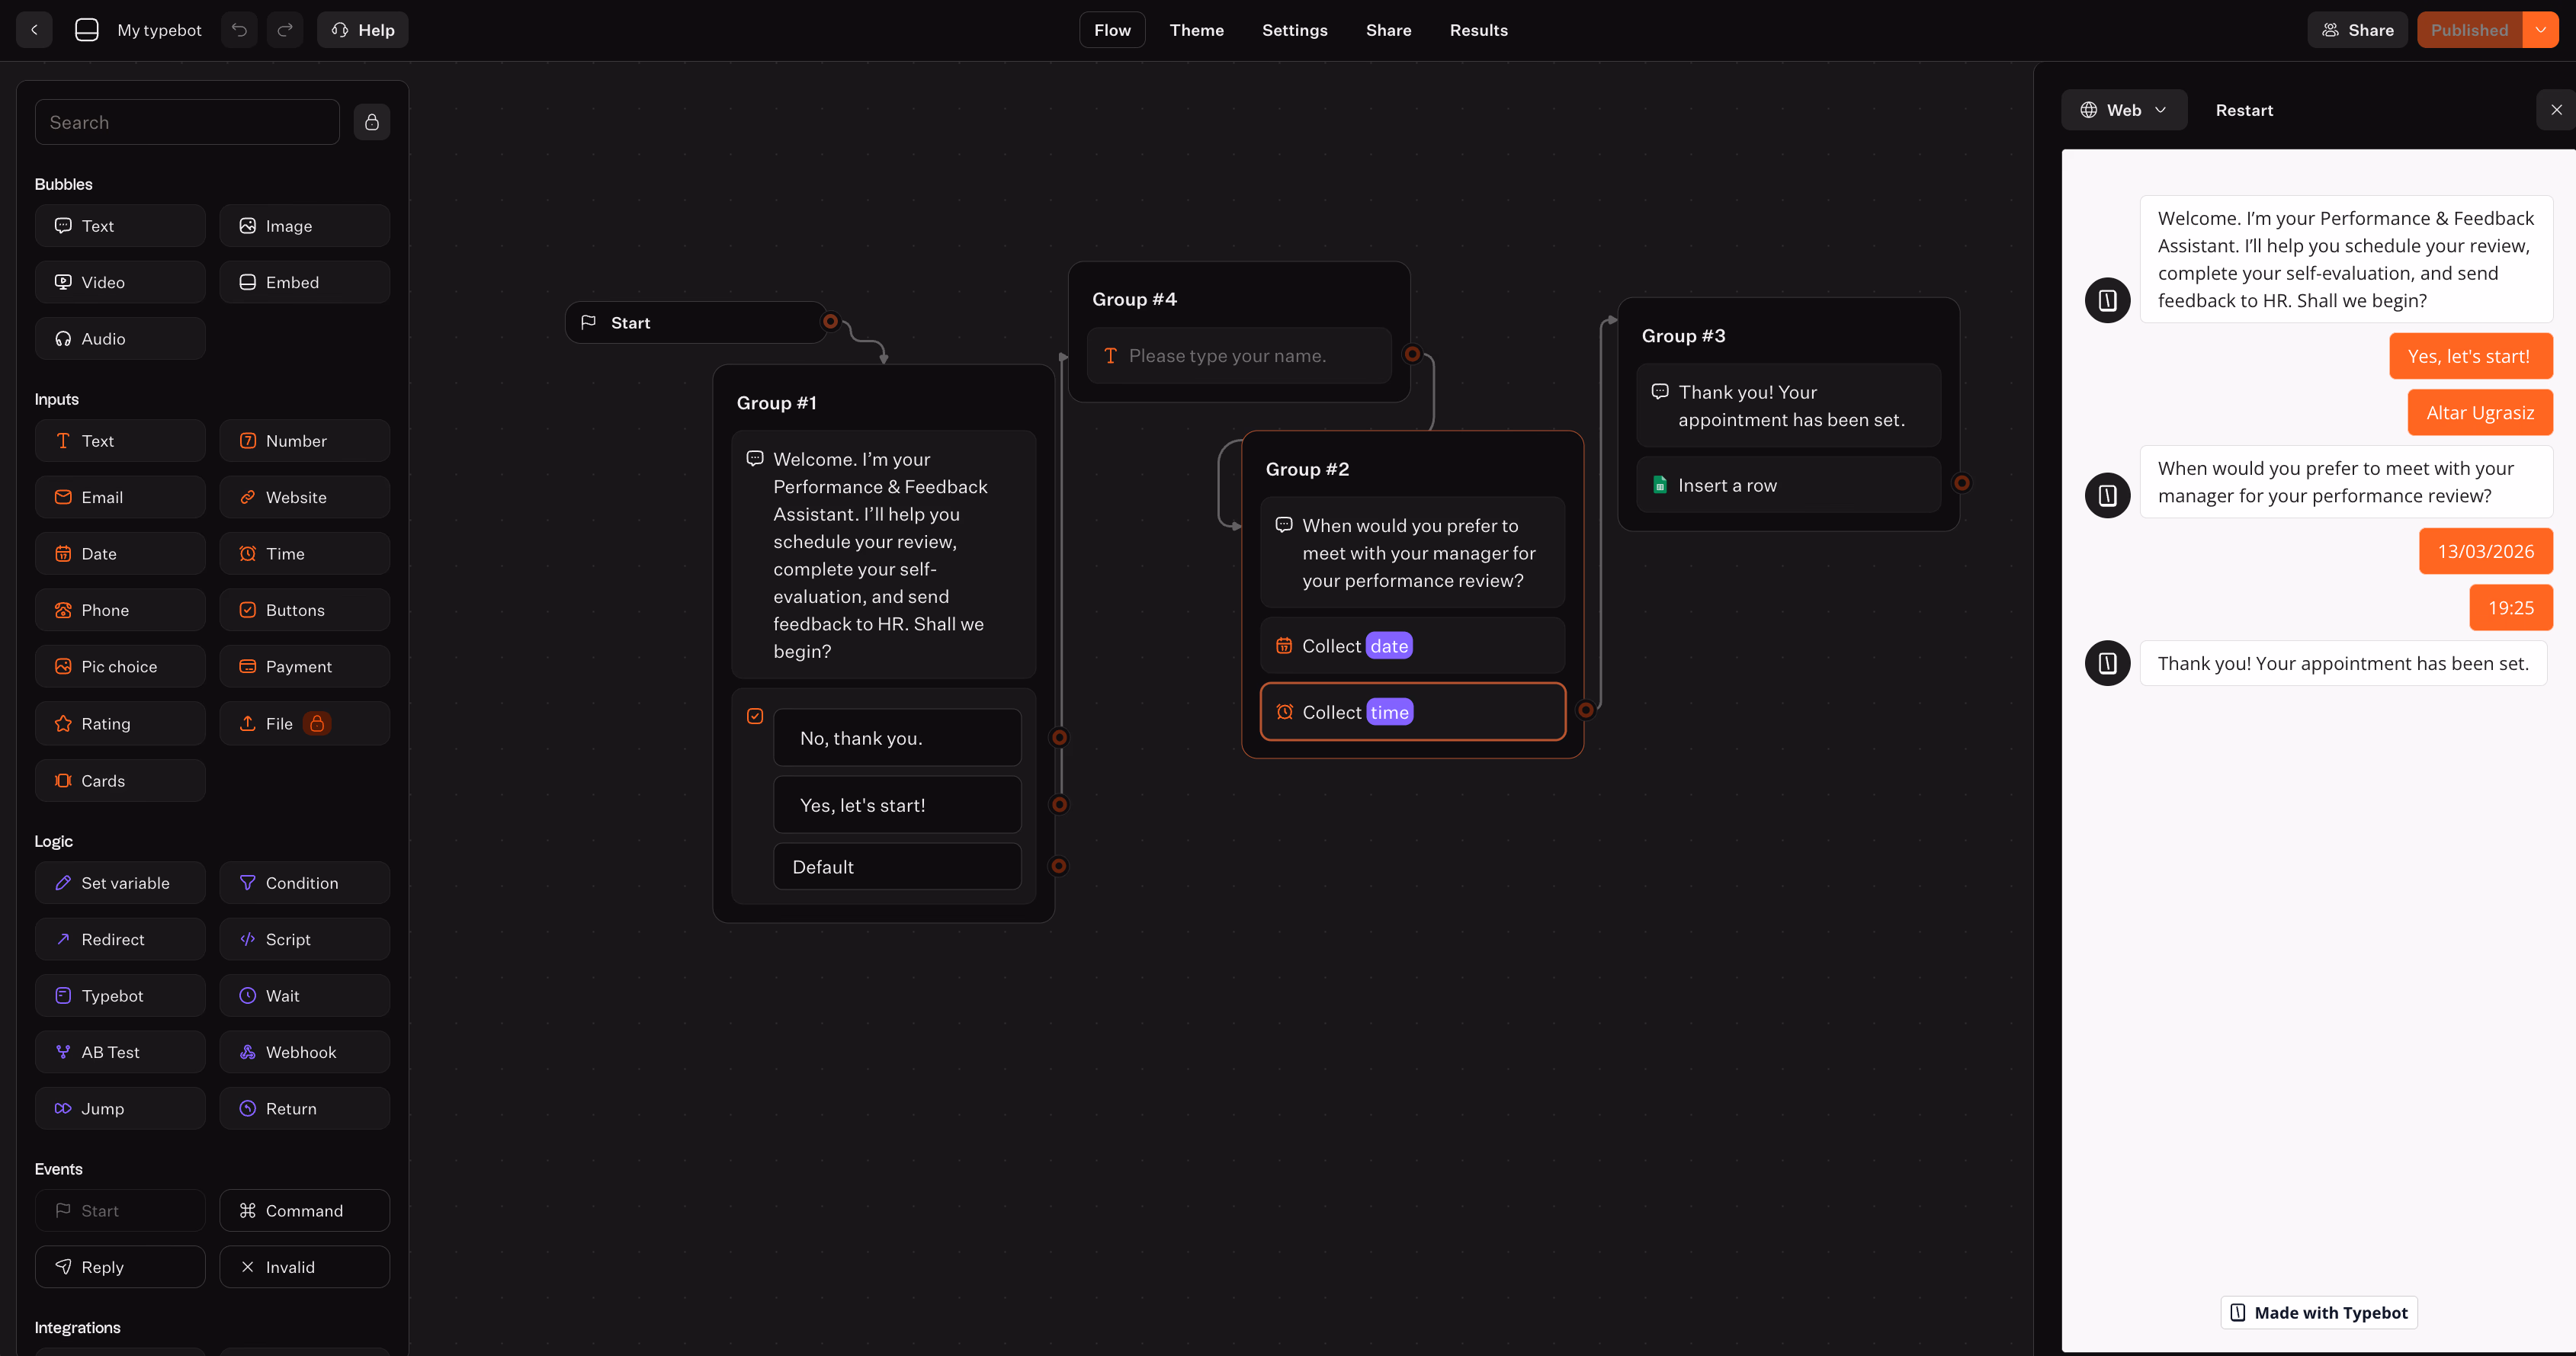
- Google Sheets for lead capture and reporting
For lead generation or tracking, sending submissions to Google Sheets offers an easy, accessible solution. Typebot allows you to map collected fields directly into a sheet for straightforward review.
Add integrations only after thoroughly testing your conversation path. This approach prevents confusion about whether issues stem from the bot design or the integration.
Typebot supports many other integrations across databases, communication tools, analytics, and automation. These help you scale from simple lead capture to automated pipelines without rebuilding the bot.
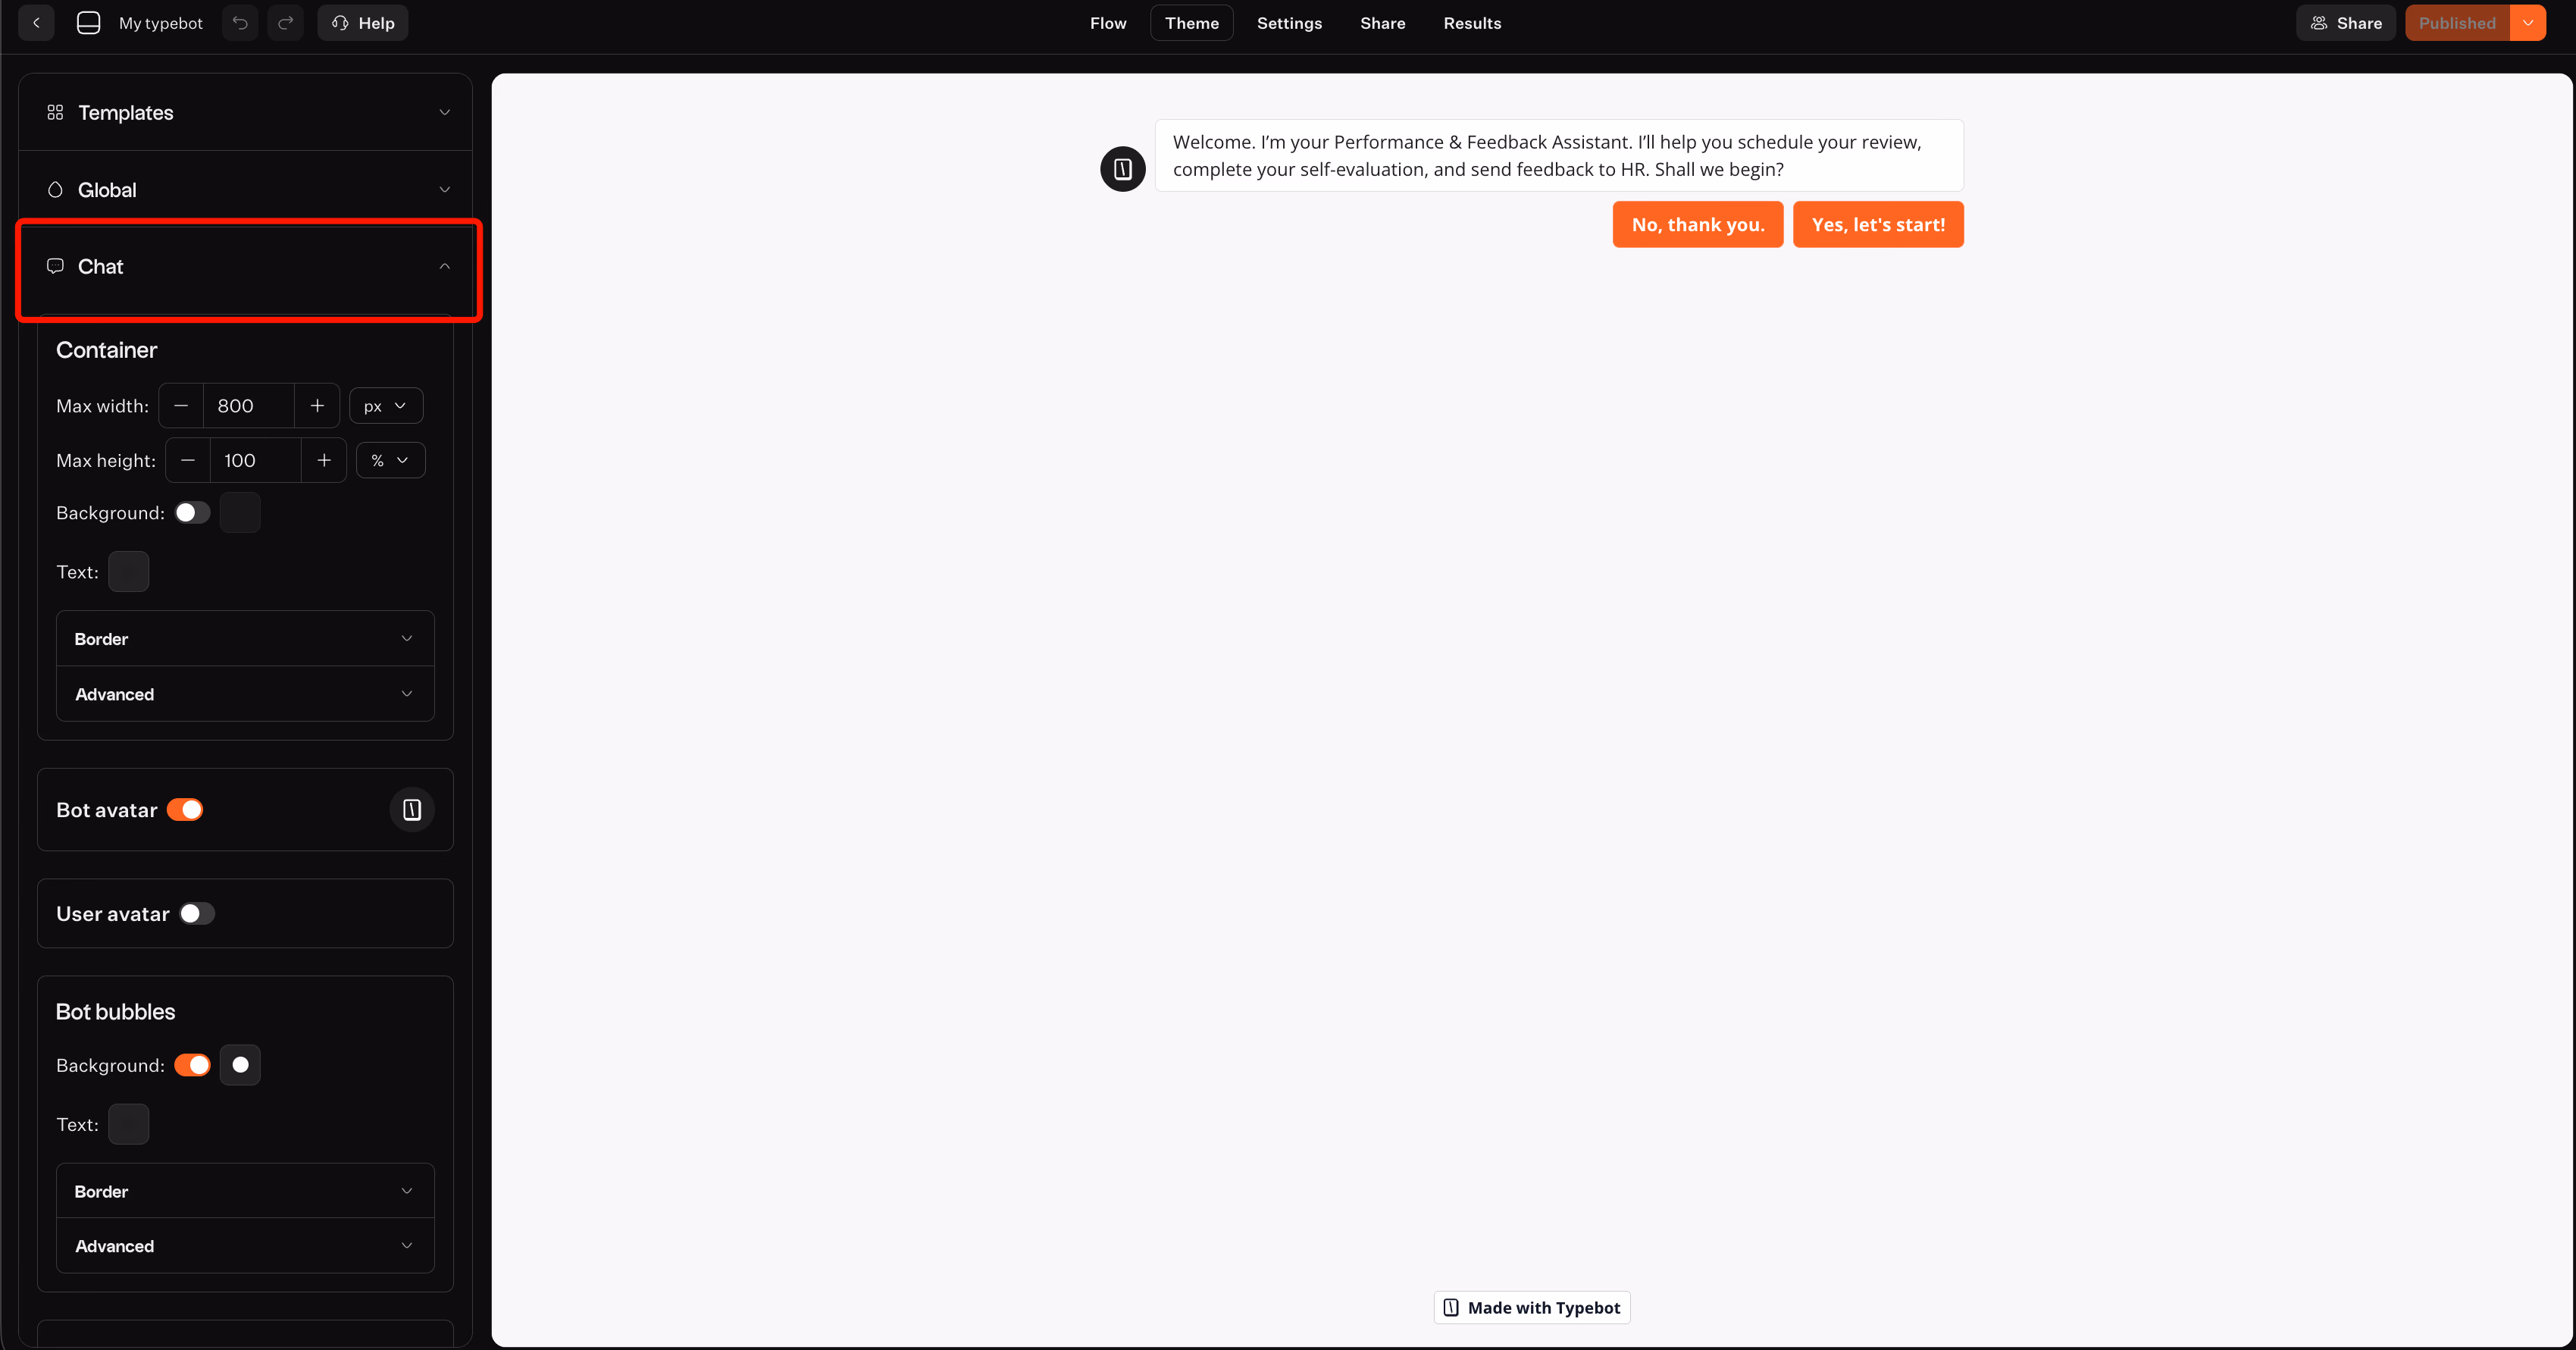
Match your WordPress theme with Typebot theming
After finalizing your flow, go to the Theme tab to adjust the chatbot’s appearance so it fits your site’s style. This helps avoid the bot feeling like a generic widget.
Two key principles guide this stage:
- Consistency beats creativity. Match your WordPress brand colors so the chatbot blends with your UI. If your site has a minimal design, keep the bot minimal too.
- Clarity beats decoration. The chat interface is a tool. Avoid design choices that confuse users or make it unclear what to do next.
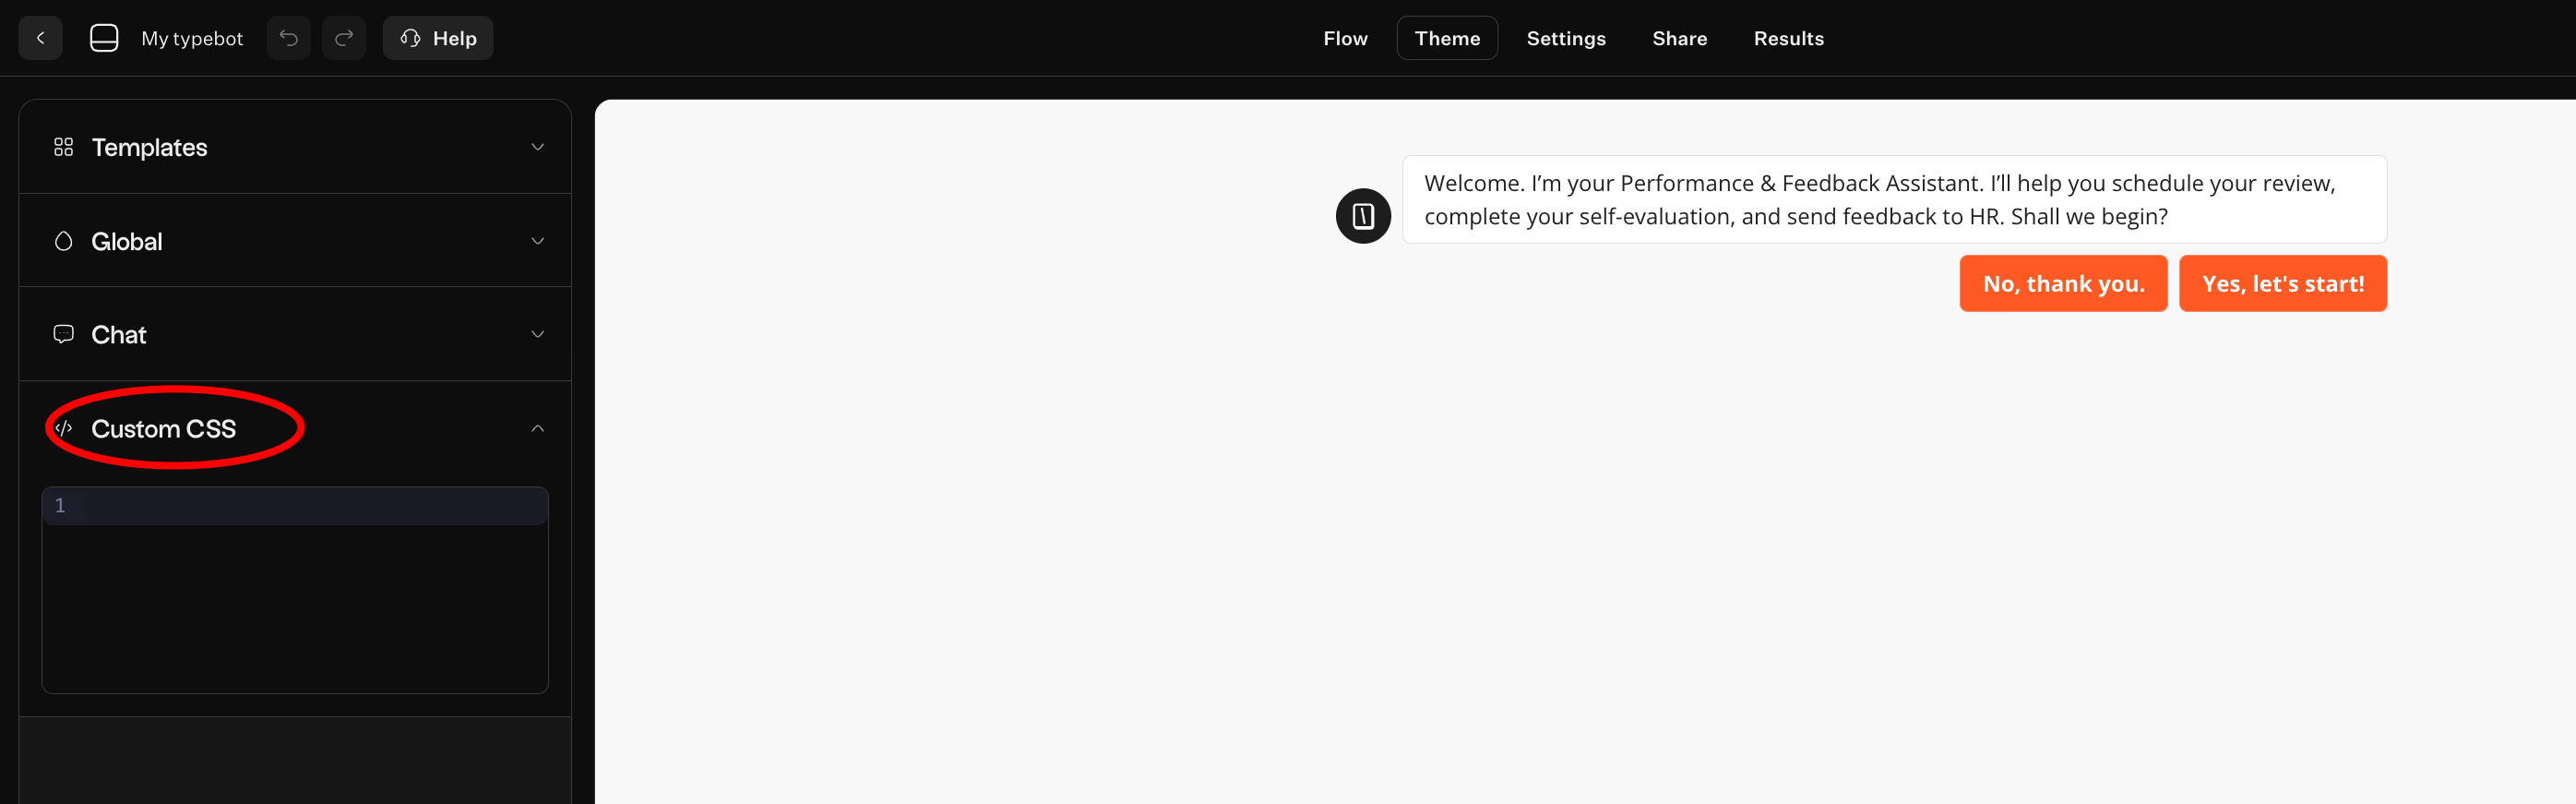
For deeper customization, Typebot supports custom JavaScript and CSS. This allows teams to align the bot perfectly with existing design systems.
When you finish designing the flow and theme, click Publish on the editor’s top bar. Publishing locks in a specific, tested version of your bot, which you then embed in WordPress.
Quick build summary before embedding into WordPress:
- Build the conversation in Flow using a mix of bubbles and inputs.
- Add Condition blocks to route visitors intelligently.
- Integrate Webhook, OpenAI, or Google Sheets after validating the UX.
- Use Theme to match the chatbot to your WordPress brand.
- Finally, Test and Publish to finalize.
Create, customize, and deploy your first Typebot today. No coding required.
No trial. Generous free plan.
Conclusion
That's it. You now know how to add a chatbot in WordPress from start to finish. With the Typebot plugin installed, your site is ready to engage visitors around the clock. The next step is simple. Publish your bot and watch it work.